Are you looking to create a professional and customized online store using Shopify? Discover the power of a Shopify development store. In this guide, we will explore what a Shopify development store is and how it can be your launching pad for building, customizing, and testing your Shopify store before going live. Let’s dive in and unlock the potential with this guide to the Shopify development store.
Table of Contents
What Is a Shopify Development Store?
A Shopify development store is a free account provided to Shopify Partners that allows them to create and test themes, apps, or entire Shopify stores. As a Shopify Partner, you can create an unlimited number of development stores through your Partner Dashboard. These stores are valuable for various purposes, including:
- Testing: You can use development stores to test themes, apps, or customizations without affecting your live storefront.
- Client Setup: Development stores are handy for setting up Shopify stores for clients. Once the store is ready, you can transfer it to the client and earn recurring commissions.
- Demo Purposes: Development stores are helpful for showcasing your store’s design or features to investors or potential clients without connecting to your live store.
- Portfolio Showcasing: Web designers and developers can use development stores to display their Shopify themes or work to potential clients or employers.
- Experimentation: You can freely experiment with Shopify’s discount engine, real-time carrier-calculated shipping, abandoned checkout recovery, and conduct test transactions without processing real orders.
However, while development stores offer many features, some limitations exist, such as the inability to install paid apps or create more than ten private apps until you switch to a paid plan. Still, a Shopify development store is a valuable tool for Shopify Partners to build, test, and showcase their work before deploying it to live stores or clients’ storefronts.
Guide to Shopify Development Store
Setting Up a Shopify Development Store
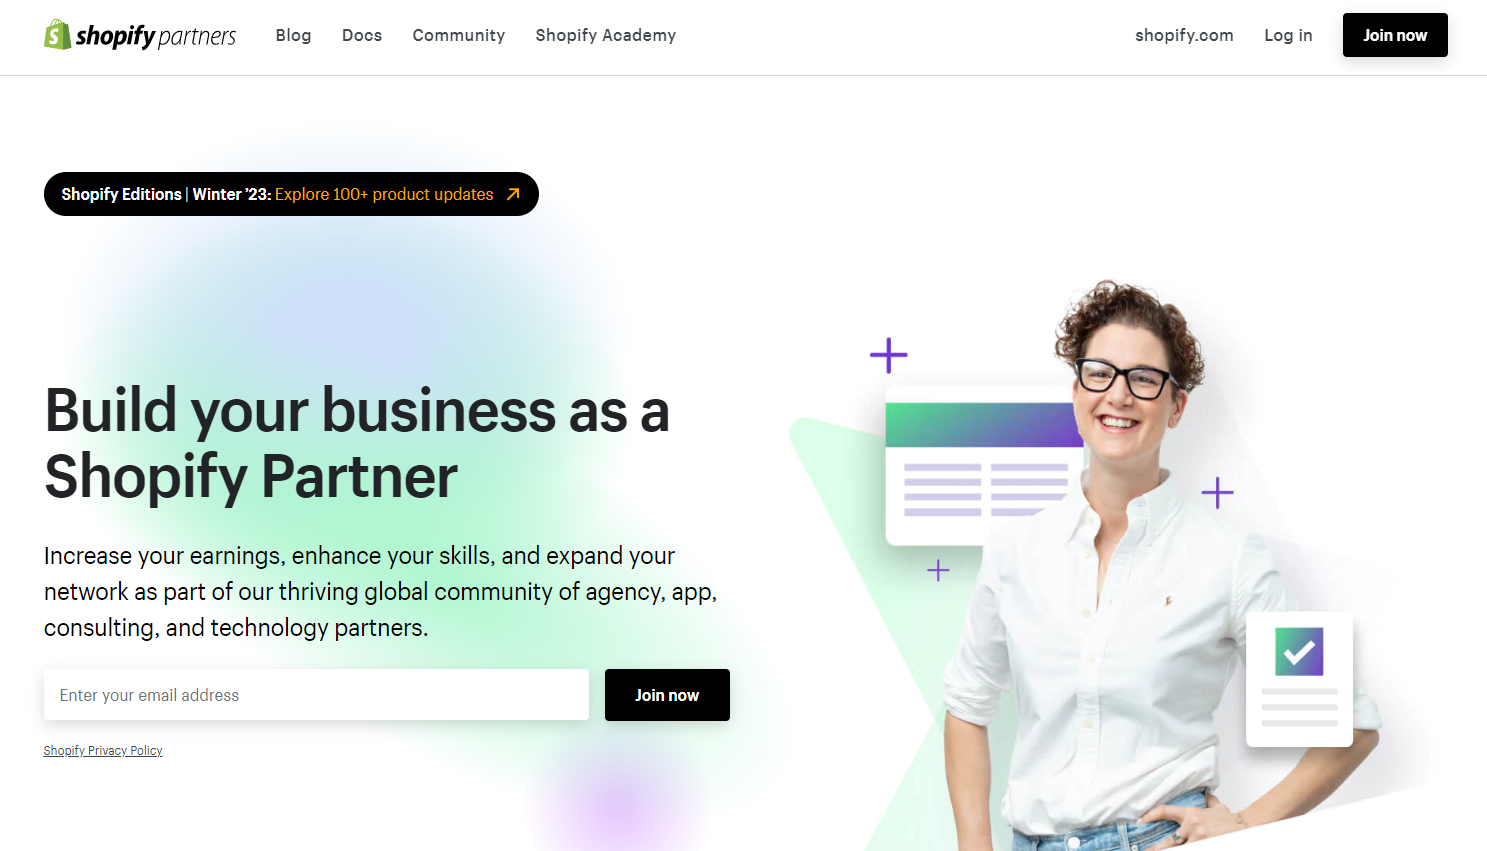
Step 1: To set up a Shopify development store, you first need to create a Shopify Partner account. Visit the Shopify Partner Program page and click on the Join now button if you are new, or click Log in if you already have a Shopify account.
Step 2: After filling in the required information, such as your email address, password, and store name, click Submit to set up your account.
Step 3: Once your account is created, you will be directed to the Partner Dashboard, which serves as the central hub for managing your Shopify development stores and partner resources.
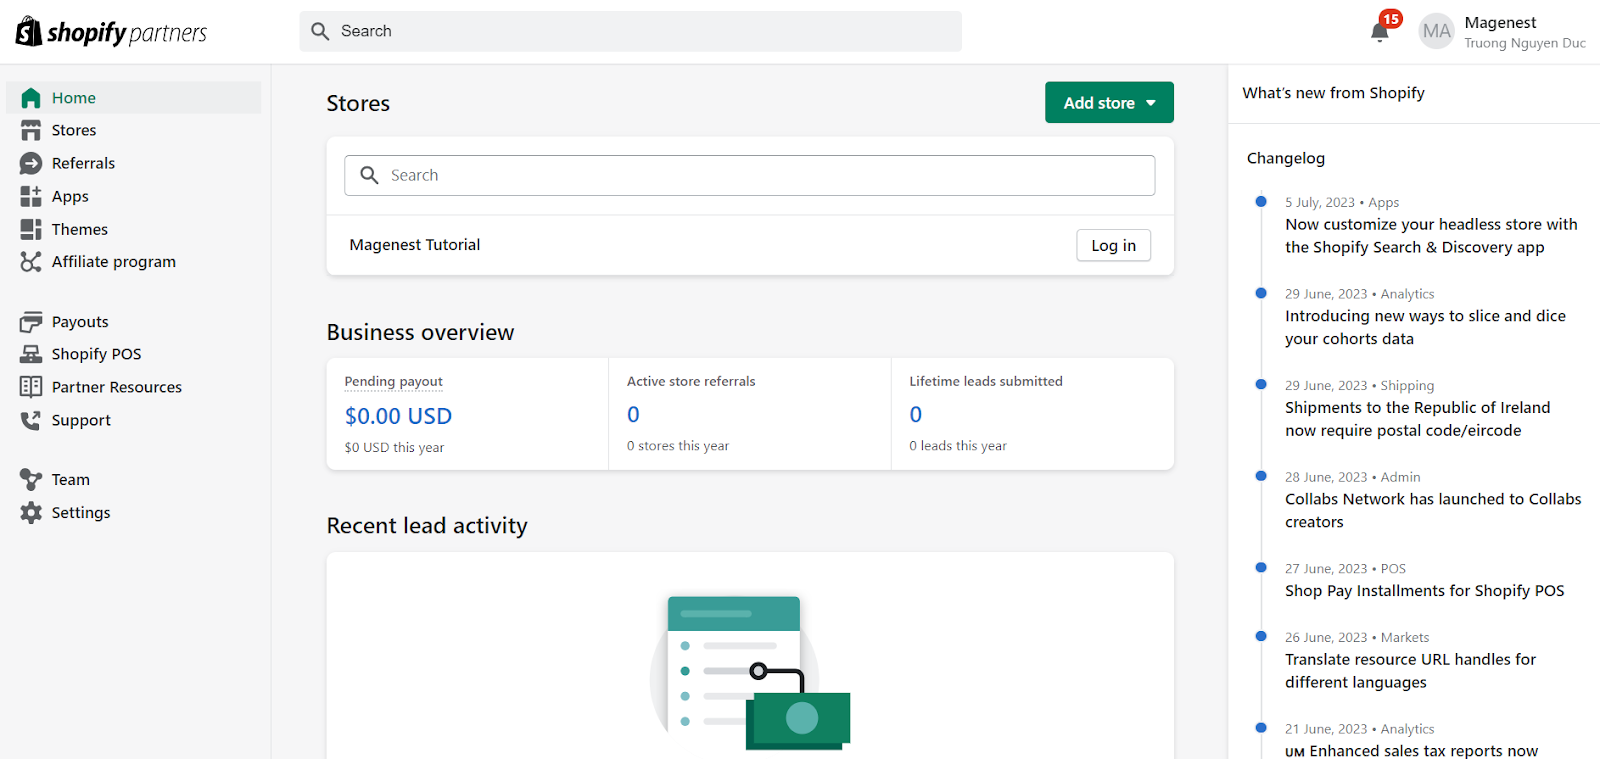
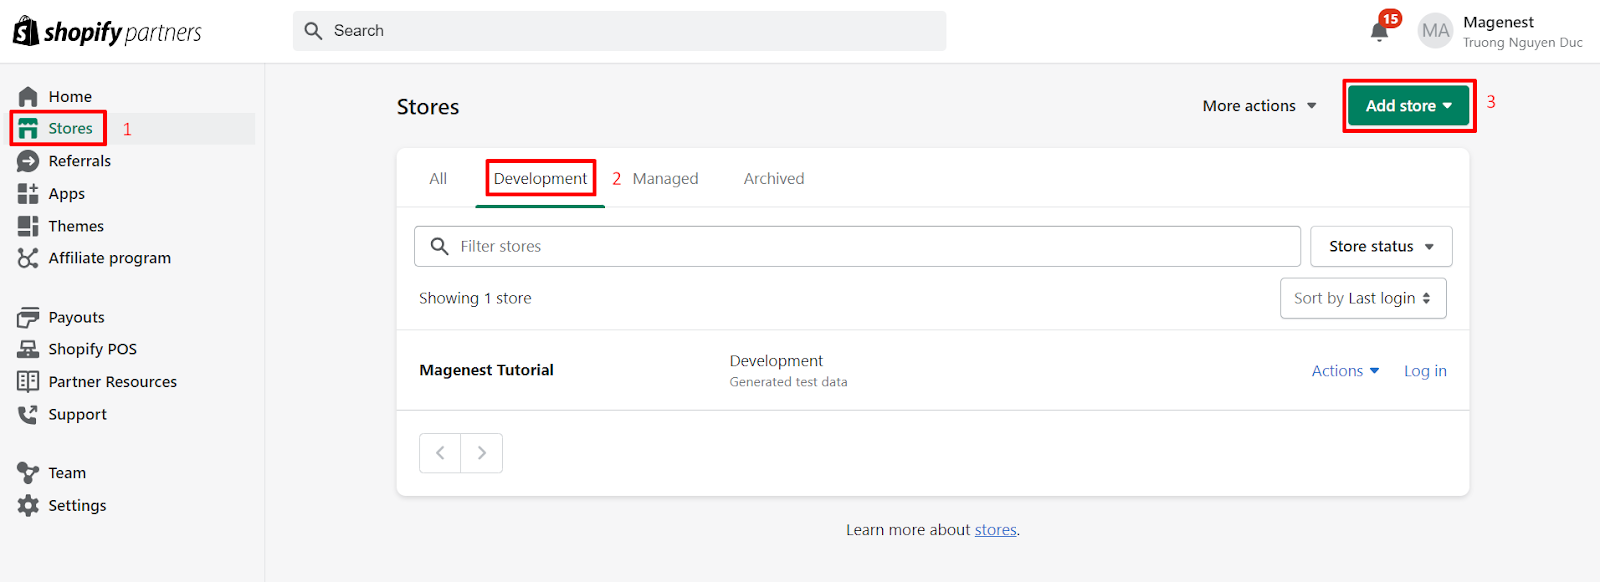
Step 4: In the Partner Dashboard, go to the Development Stores tab or navigate to Stores and choose Development Stores. This will show all your Shopify development stores. To create a new store, click on the Add Store button to initiate the process of setting up a Shopify store development.
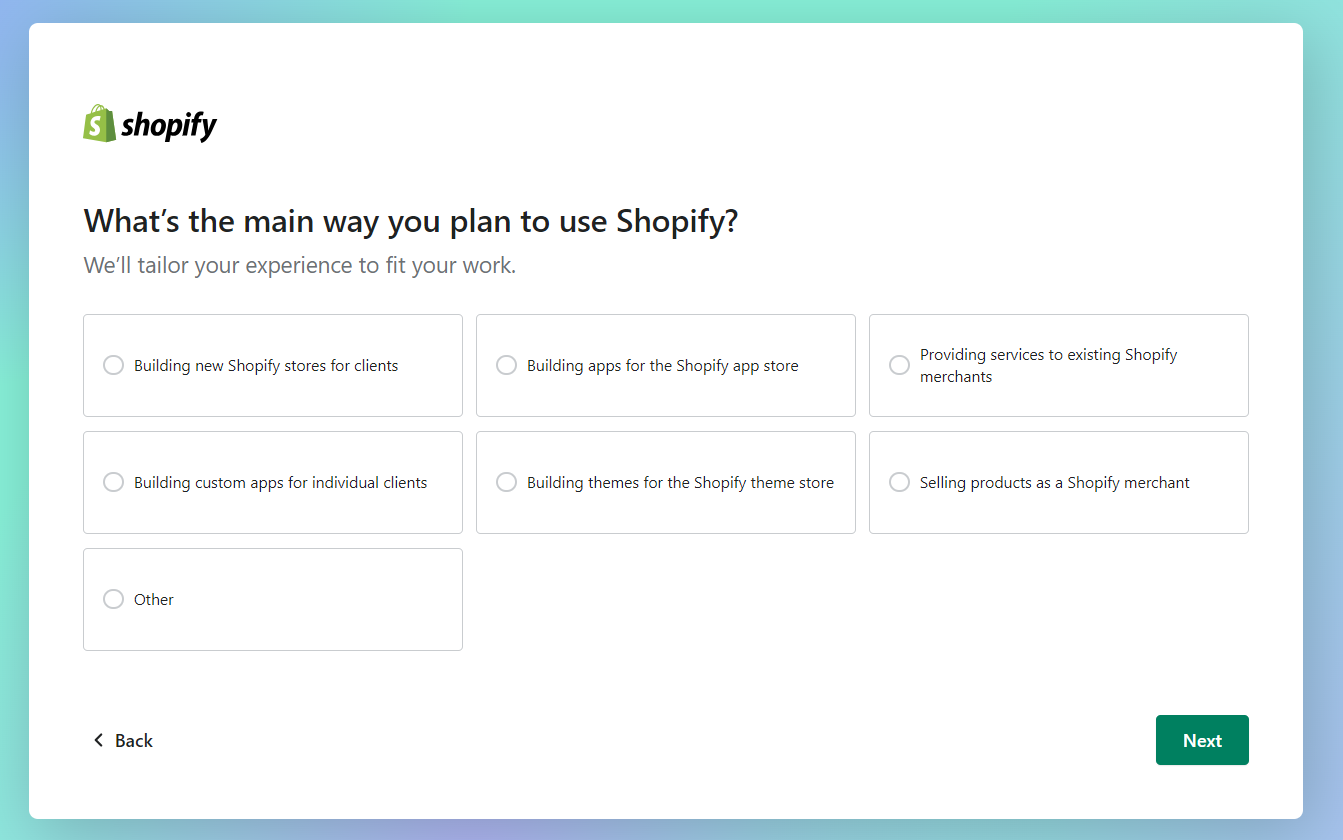
Step 5: Follow the on-screen prompts and provide the necessary details, including the store name, industry, and store type. Select the appropriate intention with your Shopify development store. Typically, the free version Create a store to test and build, but with this version, you can’t transfer its ownership. If you want to transfer the Shopify store development to your client afterward, you can select Create a store for a client. These two modes have different setting options that cater to their purpose.
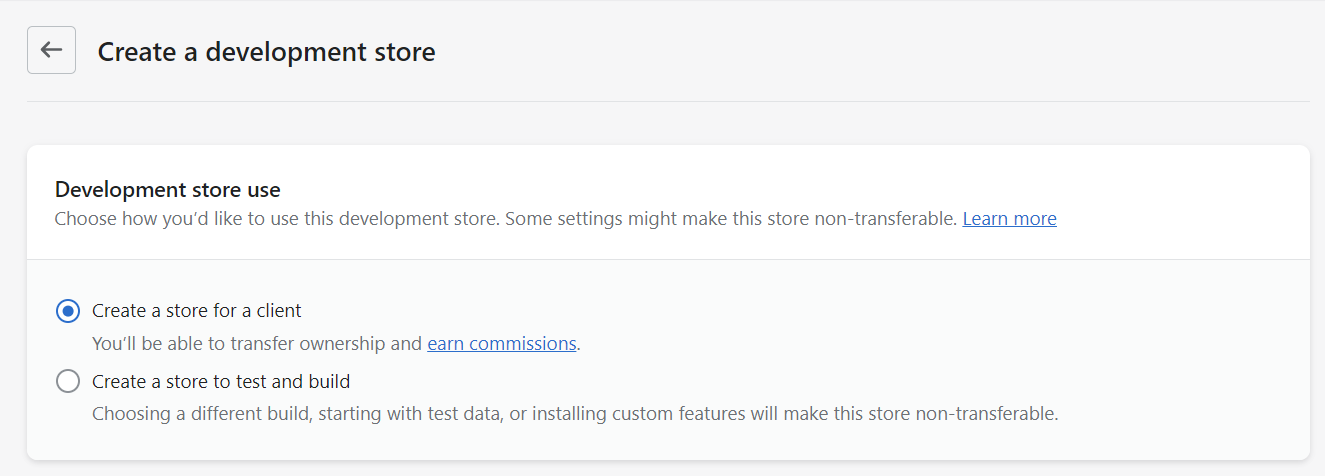
Finally, click Create Store to finalize the creation of your Shopify development store.
During the creation process, you will be prompted to pick a name for your Shopify development store. Select a unique and descriptive name that represents the purpose of your Shopify store development. Shopify will generate a default URL based on your store name, but you can customize it if desired. Ensure that the chosen URL is available and not already in use by another store. Once you have selected a suitable store name and URL, save the changes.
With these steps completed, congratulations! You have successfully set up your Shopify development store. Now, you can proceed to customize your store, test themes and apps, and utilize the features and resources available in the Shopify Admins to build and refine your Shopify projects.
Customizing the Shopify Development Store
Customizing your Shopify development store allows you to create a unique and personalized online shopping experience. Here are a few Shopify features you can customize your development store.
Customize Your Shopify Store Development Theme
You can select a theme that aligns with your store’s brand and desired aesthetic from the Shopify theme store. Access the Online Store section in the Shopify admin, click on Themes, and explore the available options. You can choose from free or paid themes, and preview them to see how they appear on your store. Magenest has recommended you some design tips and themes for different types of businesses. You can check it out to pick a suitable theme for your Shopify development store.
Once you’ve decided on a theme, customize its appearance and functionality to suit your needs. Use the Shopify Theme Editor to modify the theme’s layout, colors, fonts, and other visual elements. You can also add custom CSS or HTML code to further personalize the theme.
Adding and Organizing Products
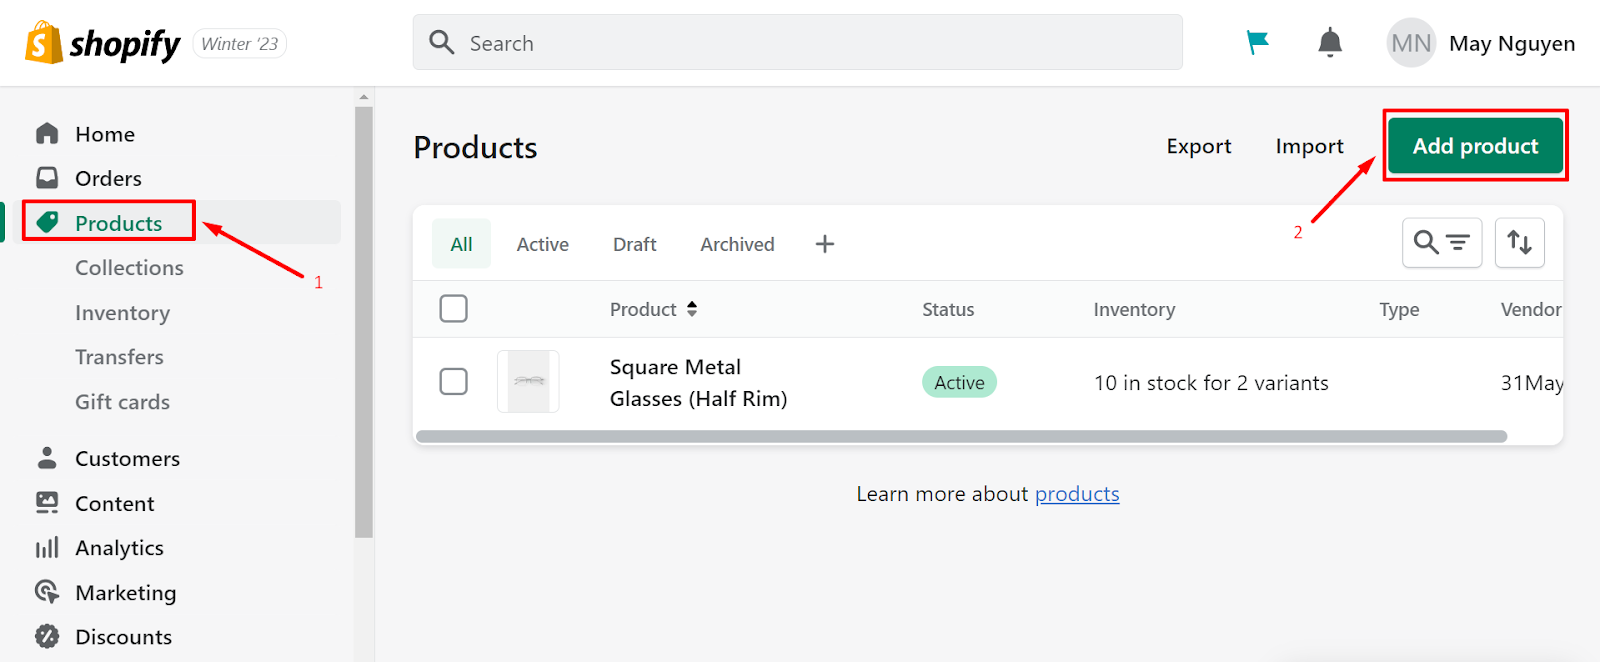
Start adding products to your development store. Access the Products section in the Shopify admin and click on Add Product to enter details such as product name, description, images, pricing, and variants.
Organize your products into categories or collections to make browsing easier for customers.
Configuring Payment and Shipping Settings
Set up payment gateways to accept customer payments. In the Shopify admin, navigate to the Settings section and click on Payment Providers. Choose from various payment options and configure the settings accordingly. Additionally, configure shipping settings to determine shipping methods, rates, and zones for your store.
Installing and Configuring Apps
Enhance the functionality of your development store by installing apps from the Shopify App Store. Explore the App Store’s extensive collection of free and paid apps that offer features such as marketing, customer support, analytics, and more. Install the desired apps and configure their settings to integrate them seamlessly into your store.
By following these steps, you can fully customize your Shopify development store, tailoring it to your brand, products, and customer preferences. Regularly review and update your customization choices to optimize your store’s performance and deliver a great shopping experience.
Testing and Improving the Customizations
Testing the Customizations
Once you have made customizations to your Shopify development store, testing them to ensure they function as intended thoroughly is essential. Test different aspects, such as the appearance, layout, navigation, product display, payment processing, and any additional features or functionalities you have implemented. Check for any errors, inconsistencies, or compatibility issues across different devices and browsers.
Iterating and Refining the Customizations
After testing, analyze the results and gather feedback to identify areas that require improvement or refinement. Take note of any user experience issues, performance issues, or suggestions for enhancements. Iterate your customizations based on the feedback and make necessary adjustments or modifications. This may involve revisiting the theme editor, tweaking the code, updating settings, or revising product organization.
Continuously test and refine your customizations based on user feedback, analytics data, and emerging trends. Pay attention to user behavior, conversion rates, and customer feedback to guide your optimization efforts. Regularly monitor and evaluate the performance of your customizations to ensure they align with your store’s goals and provide a seamless shopping experience.
Remember that the development store provides a safe environment for experimentation and refinement. Take advantage of this opportunity to fine-tune your customizations before implementing them on a live store.
Guide for Partners to Collaborate and Showcase your Shopify Development Store
Inviting Clients or Team Members to Access the Development Store
Invite clients or team members to access your Shopify development store. In the Shopify Admin Dashboard, navigate to the Setting section and choose Users and Permissions. Use the

Add staff option to send invitations to clients or team members via email. Grant them appropriate access levels to ensure they can view and provide feedback on the development store.
Collaborating and Sharing Progress
Foster collaboration by regularly communicating and sharing progress updates with clients or team members. Use communication tools such as email, project management platforms, or collaboration tools to discuss tasks, milestones, and ongoing development. Provide access to relevant documentation, wireframes, and design mockups to ensure everyone is aligned with the project’s goals and progress.
Presenting the Development Store to Clients or Stakeholders
Schedule presentations or meetings to showcase the development store to clients or stakeholders. Prepare a comprehensive demonstration that highlights the store’s features, design, functionality, and any customizations or unique selling points. Use screen-sharing tools or provide a live demo to allow stakeholders to interact with the development store and provide immediate feedback.
Gathering Feedback and Making Necessary Revisions
Collect feedback from clients, stakeholders, or team members after presenting the development store. Encourage open and constructive discussions to understand their perspectives, suggestions, and any required revisions. Consider their feedback carefully and make necessary revisions to address concerns, improve user experience, or align with the desired goals and objectives of the project. Iterate on the development store based on the feedback received to ensure it meets the expectations of all stakeholders involved.
Regularly communicate with clients or team members throughout the collaboration process, ensuring transparency and addressing any questions or concerns promptly. By actively involving stakeholders and gathering feedback, you can create a collaborative environment that leads to a successful and well-refined development store.
Transitioning to a Live Store
Before transitioning to a live store, thoroughly review your Shopify development store. Evaluate all aspects, including design, functionality, content, and user experience. Ensure everything is aligned with your desired vision and meets your business requirements.
Preparing for the Launch
Prepare for the launch of your live store by completing essential tasks. This may involve finalizing product details, organizing collections, optimizing images, setting up SEO elements, creating policies and legal pages, and configuring any necessary integrations or third-party services.
Migrating Data and Settings to a Live Store
To move your development store to a live environment, you need to migrate data and settings. This typically involves exporting and importing products, customer data, and order history.
Use Shopify’s built-in import/export features or specialized apps to facilitate the migration process. Ensure data accuracy and integrity during the transfer.
Configuring Domains and DNS Settings
Set up your domain and configure DNS settings to connect it to your live store. Purchase a custom domain through Shopify or a third-party domain registrar. Follow Shopify’s guidelines to associate the domain with your live store and adjust DNS settings as required. This step ensures that your store is accessible through your chosen domain.
Final Testing and Quality Assurance
Before launching your live store, conduct final testing and quality assurance. Test all aspects, including product browsing, add-to-cart functionality, checkout process, payment gateways, shipping calculations, and any other customizations or integrations. Verify that everything works smoothly and as expected. Perform cross-device and cross-browser testing to ensure compatibility.
Additionally, review content for accuracy, check for broken links, proofread text, and ensure that policies and legal pages are comprehensive and up to date. Address any issues or discrepancies identified during testing and quality assurance.
In conclusion
A Shopify development store is a valuable tool for Shopify Partners to create, customize, and test themes, apps, and entire Shopify stores. By following the steps outlined in this guide, you can set up a development store, customize its appearance and functionality, and test your customizations to ensure a seamless shopping experience. Utilizing a Shopify development store effectively can create impressive, customized, and fully functional Shopify stores that meet the needs of your clients and stakeholders. Embrace the opportunities provided by the development store to unleash your creativity and deliver exceptional eCommerce experiences.
If you have any questions regarding this Guide to the Shopify development store, feel free to contact our Shopify experts team at Magenest.