Navigating the world of taxes can be daunting for any online retailer, especially when operating on a robust platform like Shopify. Understanding tax regulations, setting tax rates, and maintaining compliance is crucial to running a successful eCommerce business. This comprehensive guide aims to simplify the process by breaking down the various aspects of taxes on Shopify, from initial setup to advanced tips and best practices. We will explore the steps to set up tax settings, collect sales tax & shipping taxes, tax reports, and compliance, and taxes for international orders, and share expert advice to help you manage your tax responsibilities efficiently and effectively. By the end of this guide, you’ll be well-equipped to tackle your tax obligations with confidence and ensure your Shopify store is operating in adherence to all relevant tax laws.
Table of Contents
What Is Shopify Taxes?
It’s important to clarify that the term Shopify taxes does not refer to any taxes owed to the Shopify platform itself. Instead, it pertains to the sales taxes that you, as a vendor, must calculate, report, and remit for the products you sell on your Shopify store. Manually tracking and accounting for taxes on all your products can be a daunting task, but Shopify offers a solution by providing automatic sales tax calculations that align with constantly evolving tax laws and regulations.
Shopify utilizes a range of default sales tax rates, which are regularly updated to ensure accuracy. As a vendor, it’s your responsibility to verify that these suggested tax rates are up-to-date and accurate for your business. Additionally, Shopify enables merchants to set up tax overrides, allowing for manual adjustments when necessary.
At this point, it may seem like most of your tax-related responsibilities are taken care of. However, it’s crucial to understand that the process isn’t entirely automated. While Shopify calculates and compiles tax information for you, it does not handle the actual filing and remittance of sales taxes on your behalf. The platform merely serves as a tool for gathering and organizing the calculations and reports needed for efficient tax filing, leaving the responsibility of tax reporting and remittance to you, the vendor. Furthermore, to be able to utilize Shopify tax, you must meet the following criteria:
- Orders must both originate and be delivered to locations within the United States.
- Orders must use one of these payment methods: credit cards, gift cards, or orders manually marked as paid.
In cases where a tax calculation cannot be executed using Shopify Tax, the tax calculation will be performed using registration-based, non-rooftop accurate calculations. But fear not, as our step-by-step guide is here to assist you in setting up precise taxes for your Shopify store.
Setting Up Taxes on Shopify
General Steps to Set Up Tax Settings in Shopify
Set up the countries you will be shipping to
The first step is to determine the countries you will be shipping your products to and make sure you have the necessary shipping options and rates in place for each country.
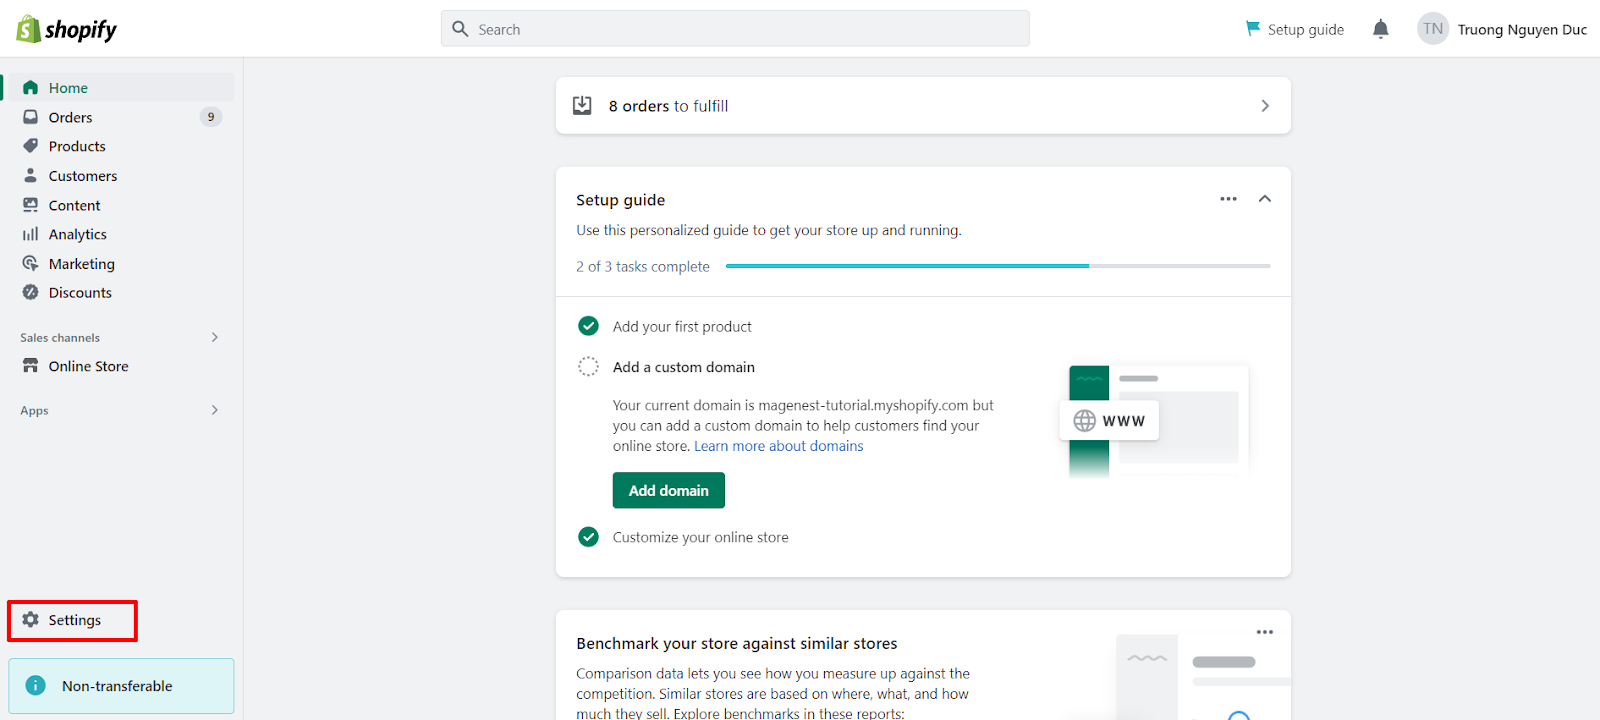
- Go to Settings in your Shopify admin.
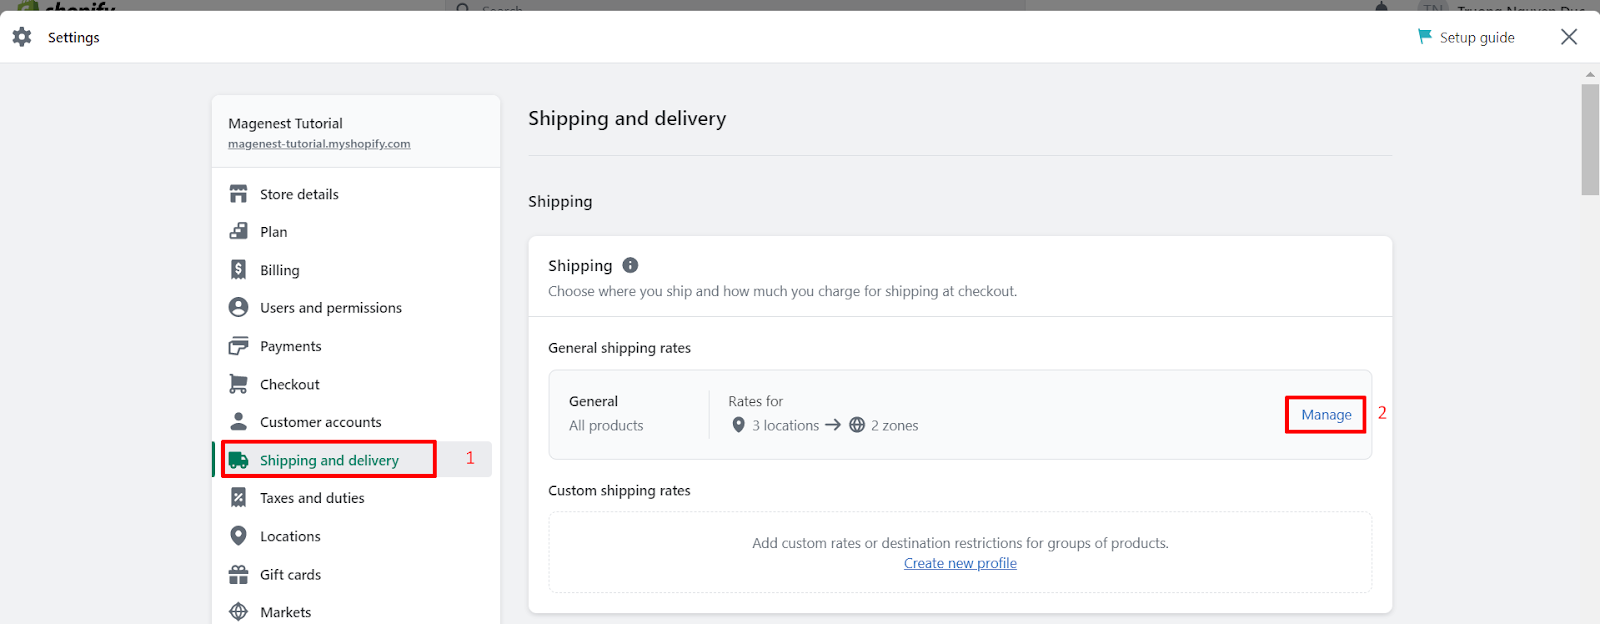
- Choose Shipping and delivery and click on the shipping profile where you want to add a shipping zone, and click Manage.
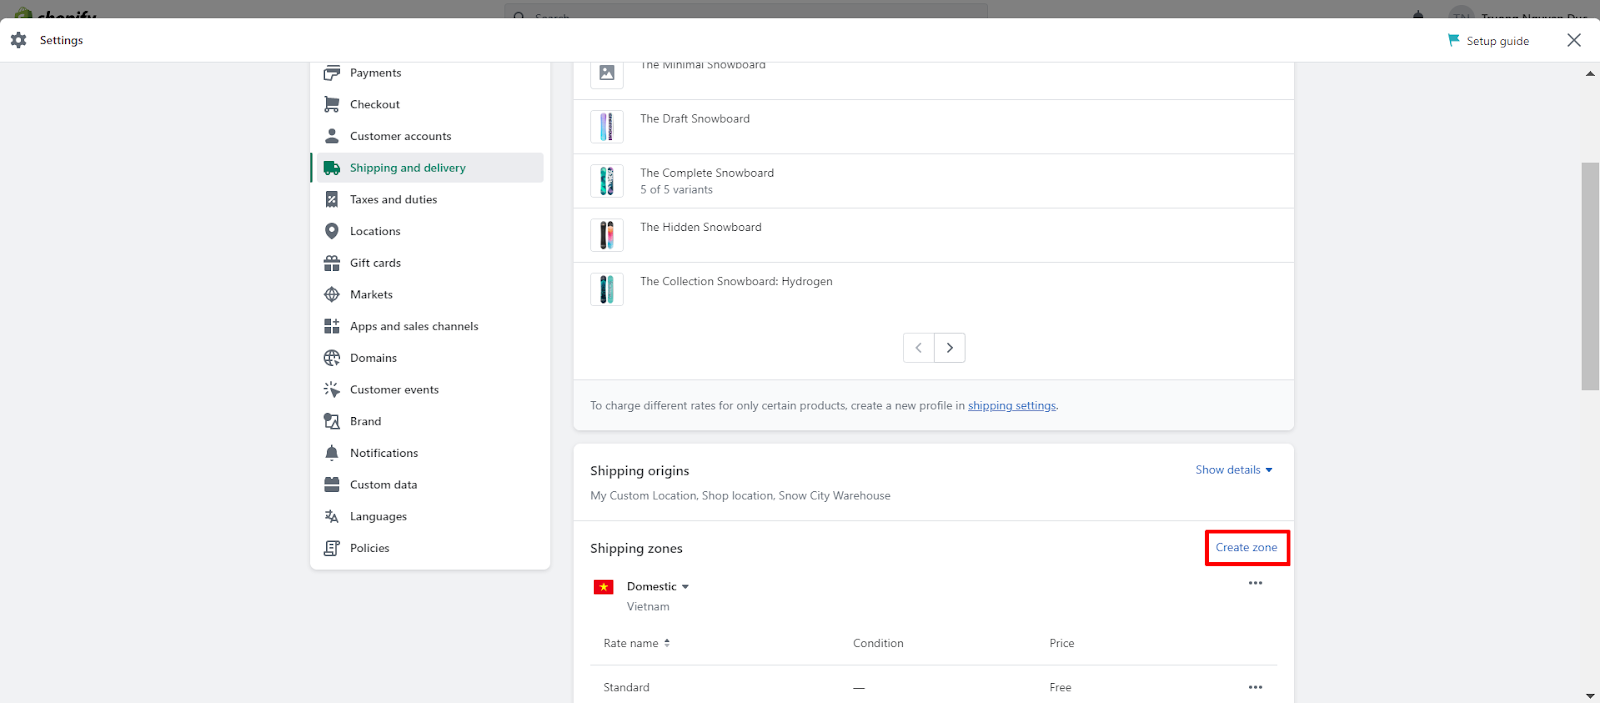
- Next, click Create zone next to the group of locations where you want to add a shipping zone.
- Enter a name for the shipping zone and select the countries and regions that you want to include. If your region uses location-based taxes, use the default values or specify rates for countries and their regions. If your region uses registration-based taxes, enter your tax registrations to collect tax. This applies to the United States, Canada, the European Union, the United Kingdom, Norway, Switzerland, Australia, and New Zealand.
- Add any rates that you want for the zone, and then click Save.
Set up tax rates for Shopify POS
If you have physical retail locations and are using Shopify POS, make sure you have set up tax rates for each location based on local tax laws and regulations.
- Open the Shopify POS app and click on Store settings.
- Select Taxes and enable the option to Calculate taxes for orders.
- Assign a store location to your POS device, which will be used to apply taxes.
- Ensure that your store locations are included in your shipping zones for taxes to be calculated correctly.
Tax Registration: Obtaining Necessary Tax IDs
Before you can begin collecting sales tax through your Shopify store, it’s essential to obtain the necessary tax identification numbers or sales tax permits required by the jurisdictions in which you conduct business. These tax IDs serve as a way for tax authorities to identify and track your business’s tax obligations.
The process for obtaining tax IDs varies by location, but generally involves the following steps:
- Research the requirements: Determine which tax authorities you need to register with based on your business location, the locations of your customers, and any other relevant factors. This may include local, state, and federal tax agencies.
- Gather necessary information: Collect the required information about your business, such as your Employer Identification Number or Social Security Number, legal business name, contact information, and business structure.
- Complete the registration process: Visit the website of the relevant tax authority and follow their instructions to register for a tax ID or sales tax permit. This often involves filling out an online or paper application and providing the necessary information about your business.
- Receive your tax ID: Once your application has been processed and approved, you will receive your tax identification number or sales tax permit. Be sure to keep this information in a safe and easily accessible location, as you will need it for tax reporting and remittance.
- After obtaining your tax IDs, you can input them into your Shopify store’s tax settings to ensure accurate tax calculation and compliance. Remember to stay informed about any changes in tax regulations that might affect your business, as you may need to update your tax registration or obtain new tax IDs as your business evolves or expands.
Setting Up Tax Exemptions in Shopify
Setting up tax exemptions is essential for merchants to ensure compliance with local tax laws and regulations. Certain products, services, or customers may be exempt from taxes. By configuring tax exemptions in Shopify, you streamline the tax calculation process, maintain accurate records, and build trust with your customers by charging the correct amount of tax on their purchases. Setting up tax exemptions in Shopify requires a few key steps to ensure that you correctly override tax rates or exempt specific products from taxes. Here’s a summary of the steps:
Setting up tax exemptions for a collection of products
The first step is to create a manual collection for tax-exempt products. By grouping the products that require a tax exemption in a manual collection, you can easily apply the tax override to the entire collection.
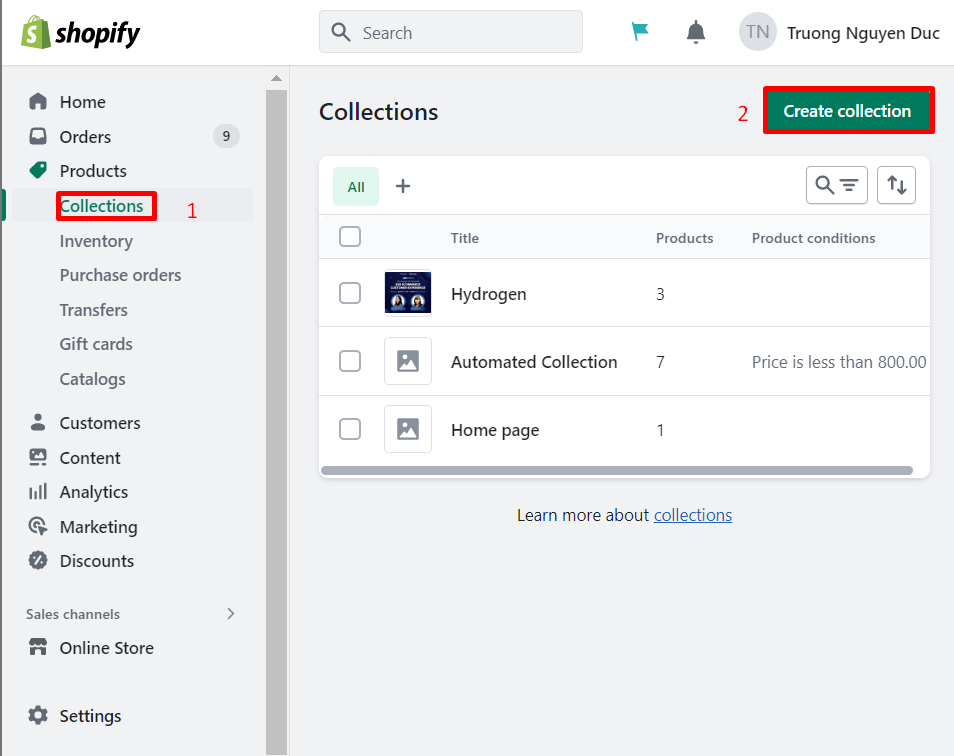
- Go to Products > Collections in your Shopify admin.
- Click Create collection.
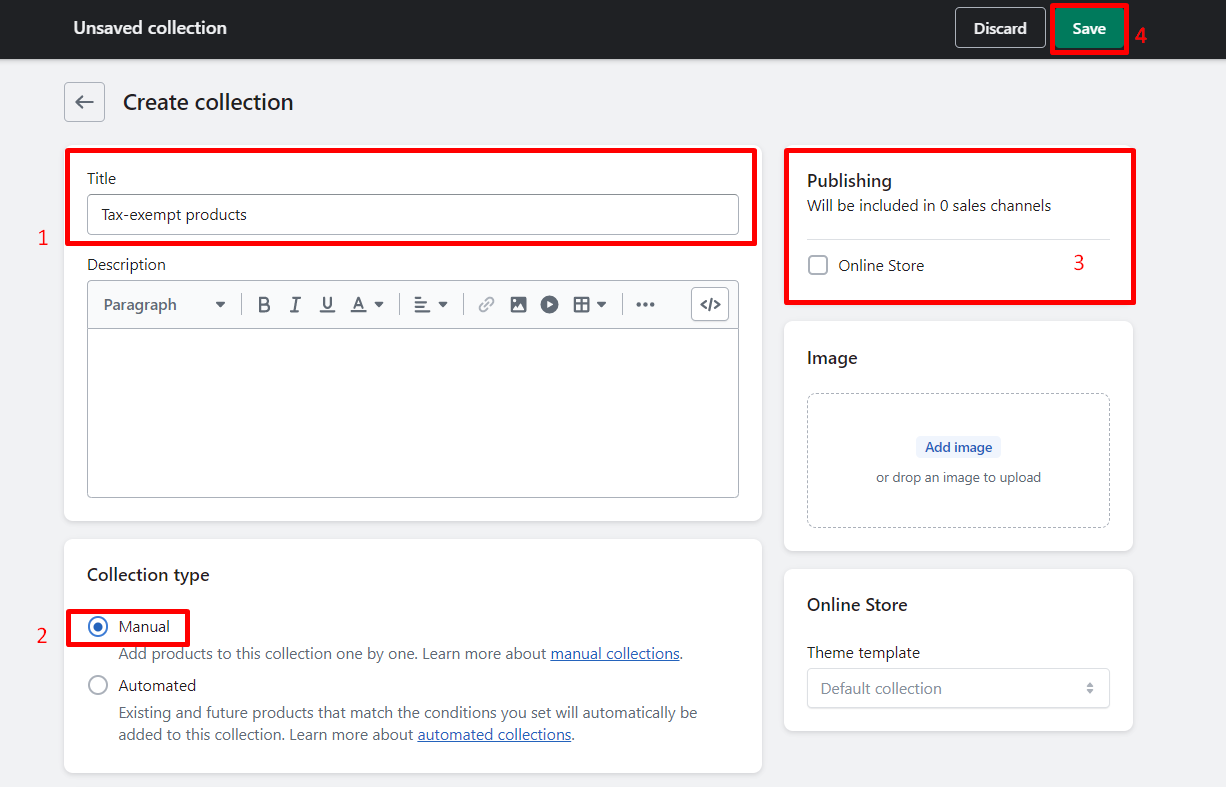
- Enter a name for the collection.
- Under Collection type, select Manual.
- (Optional) To hide the collection from active sales channels, in the Publishing section and deselect the checkboxes for the relevant sales channels.
- Click Save.
- Scroll down and In the Products section, click Browse.
- Select the products you want to add to the collection and click Done.
The second step is setting up tax overrides by utilizing tax overrides to control tax rates for specific products, handle tax exceptions and exemptions, specify unique tax rates for shipping destinations, or set up unique tax rates for tax-exempt customers.
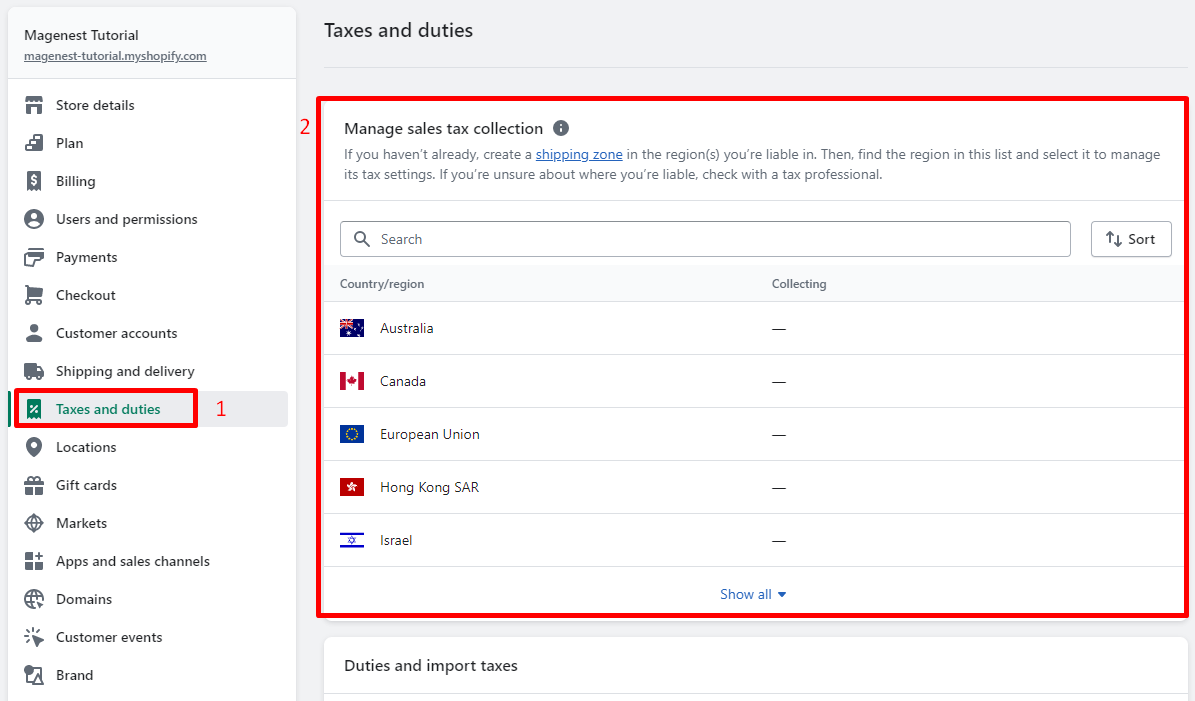
- Go to Settings > Taxes and duties in your Shopify admin.
- Click the name of the country for which you want to add the tax override.
- In the Tax overrides section, click Add a tax override.
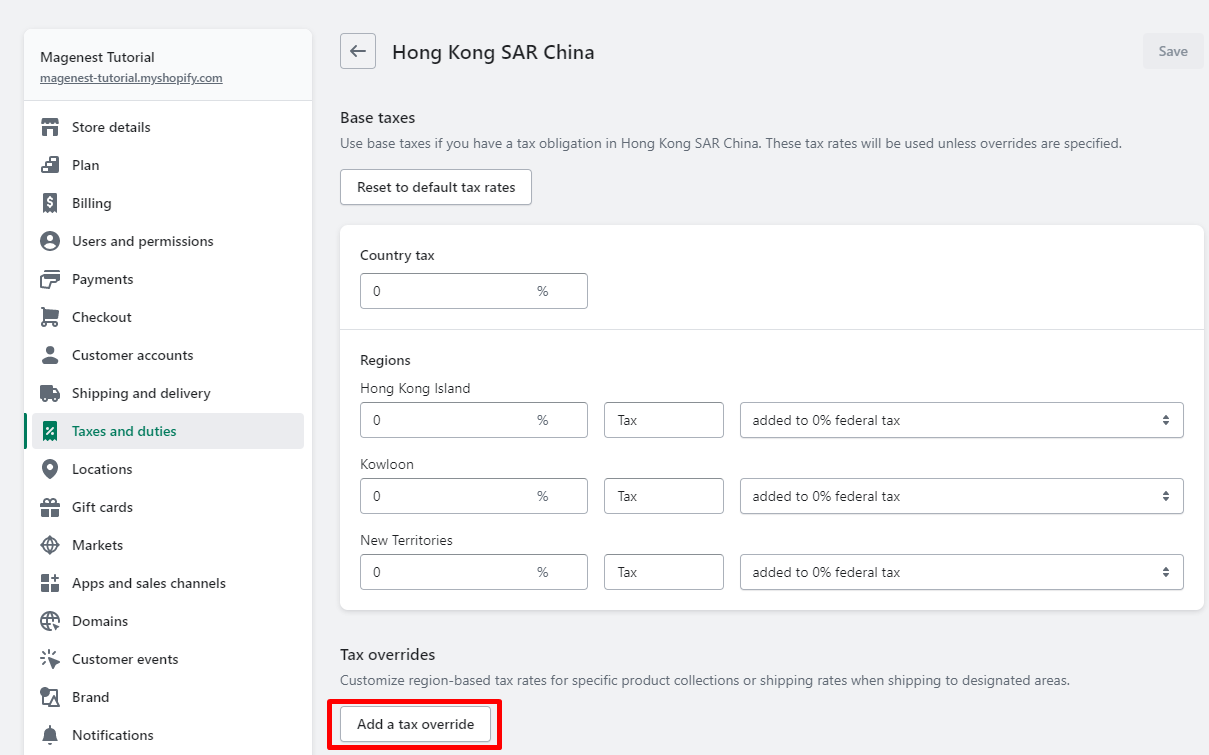
- Here, you can choose between add tax override for Products or Shipping.
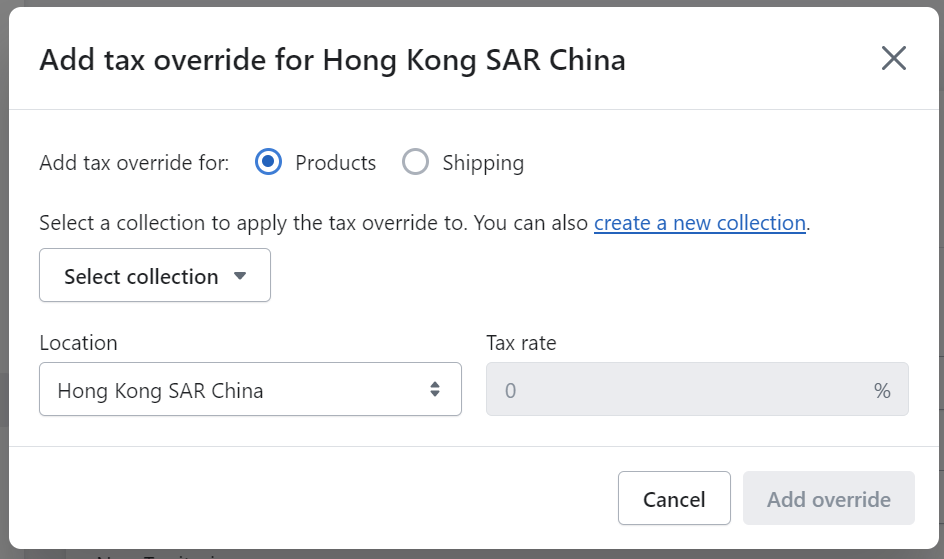
- Click Select a collection and pick the collection that needs an override.
- Under Location, select the specific place where you want the override to apply.
- Under Tax rate, enter the tax rate you want to charge for the products in the collection.
- Click Add Override.
Setting up tax exemptions for an individual product
Another way you can do this is to apply tax exemptions to individual products. For a small number of tax-exempt products, you can prevent taxes from being applied to these products individually.
- Go to Products in your Shopify admin and click the name of the product.
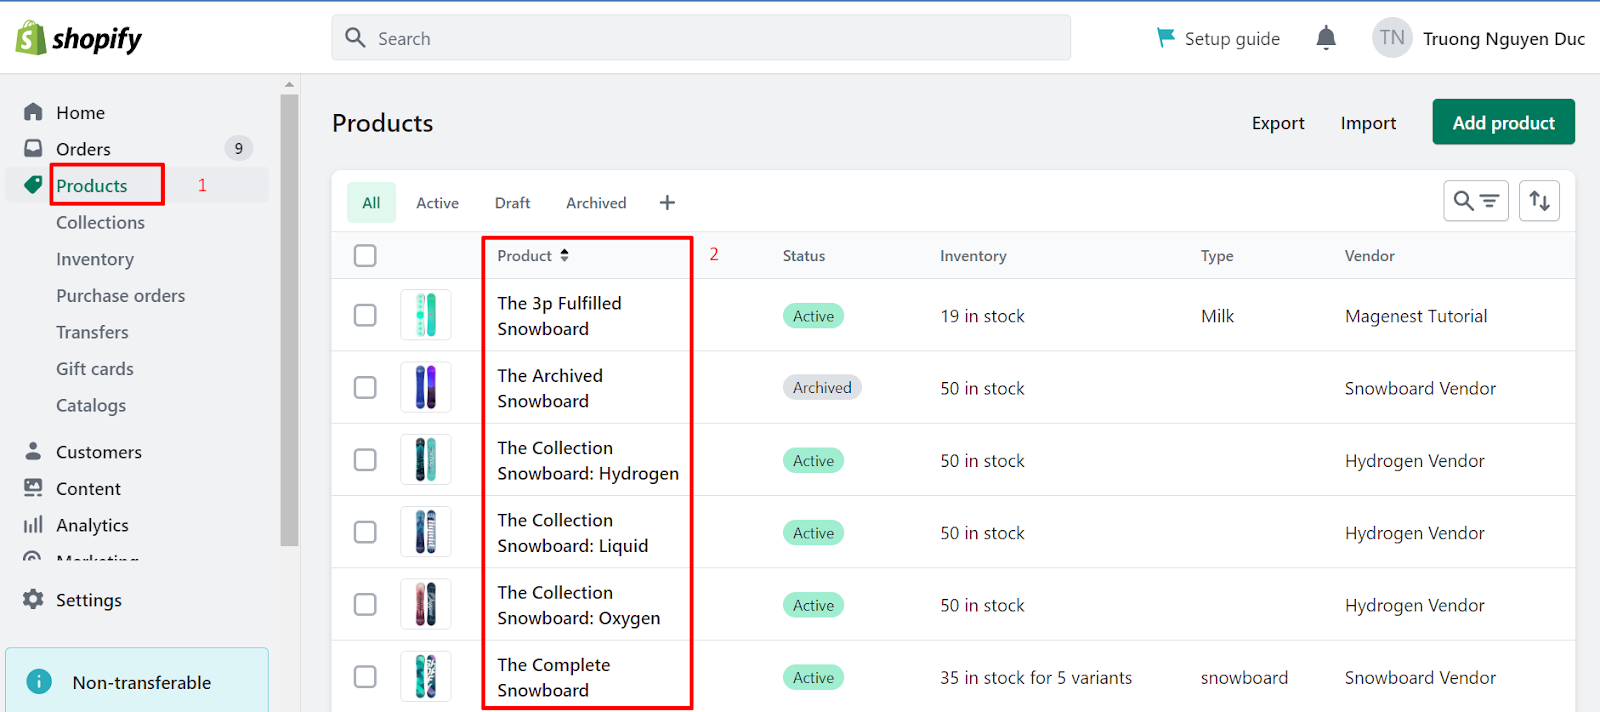
- In the Pricing section, uncheck Charge taxes on this product.
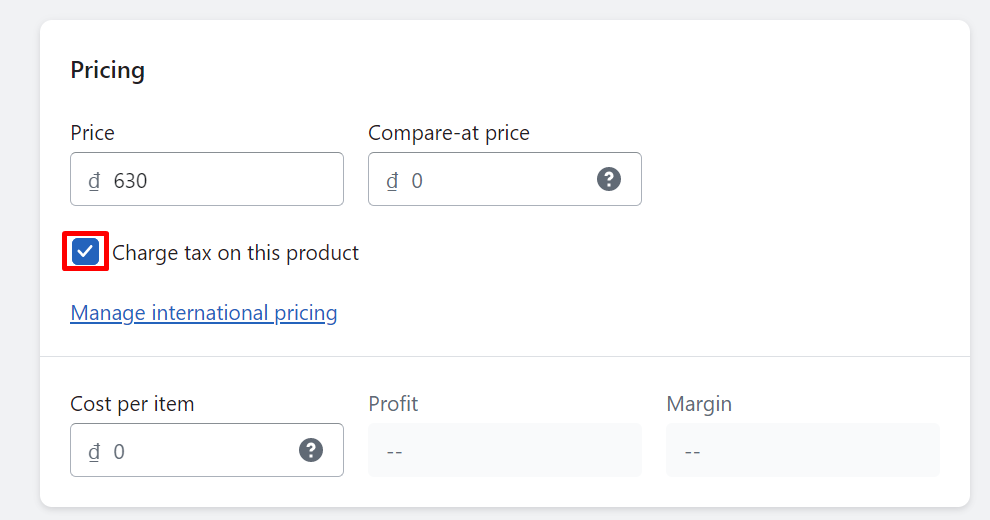
- Click Save.
Setting up tax exemptions for customers
On the Customers page in your Shopify admin, you can designate specific customers as tax-exempt, so they won’t be charged any taxes during checkout.
- Go to Customers in your Shopify admin.
- Find the customer you want to be exempt from all taxes, and click their name.
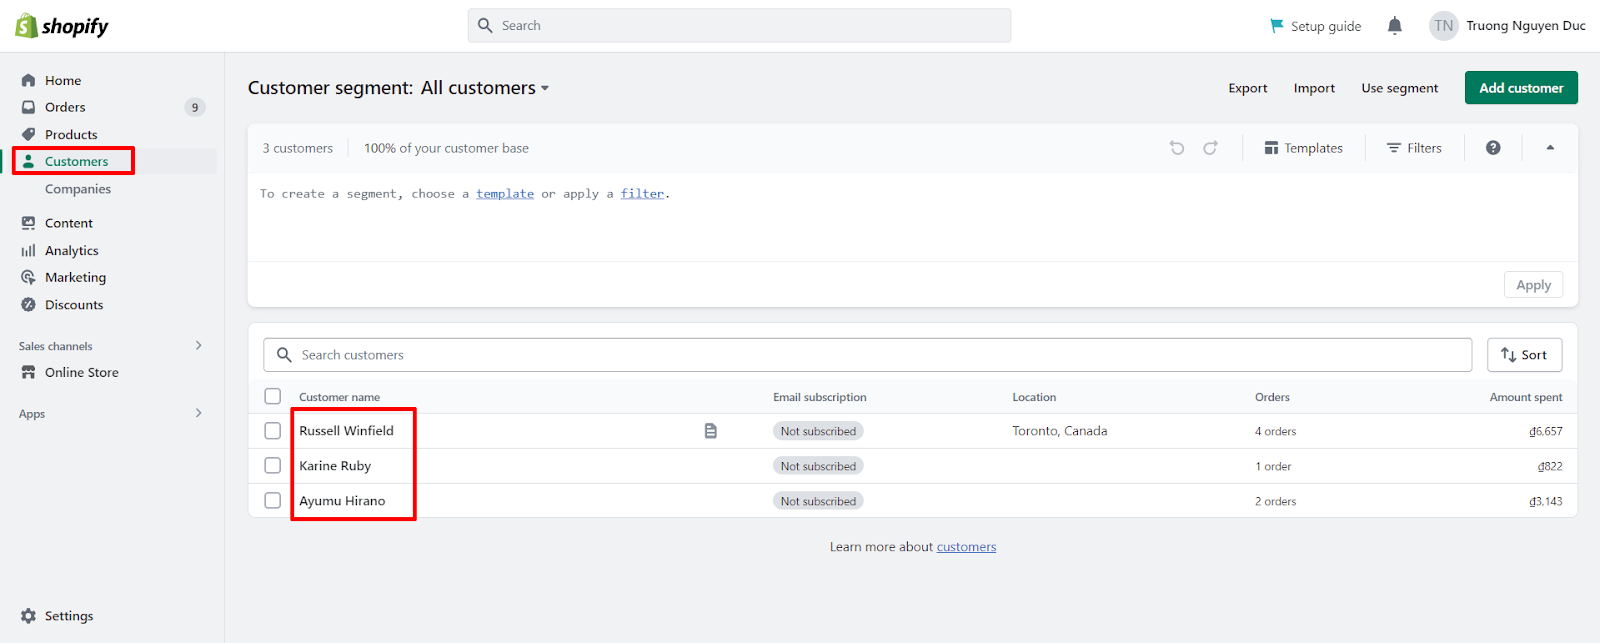
- In the Manage section, click Manage tax exemptions.

- Uncheck Collect tax.
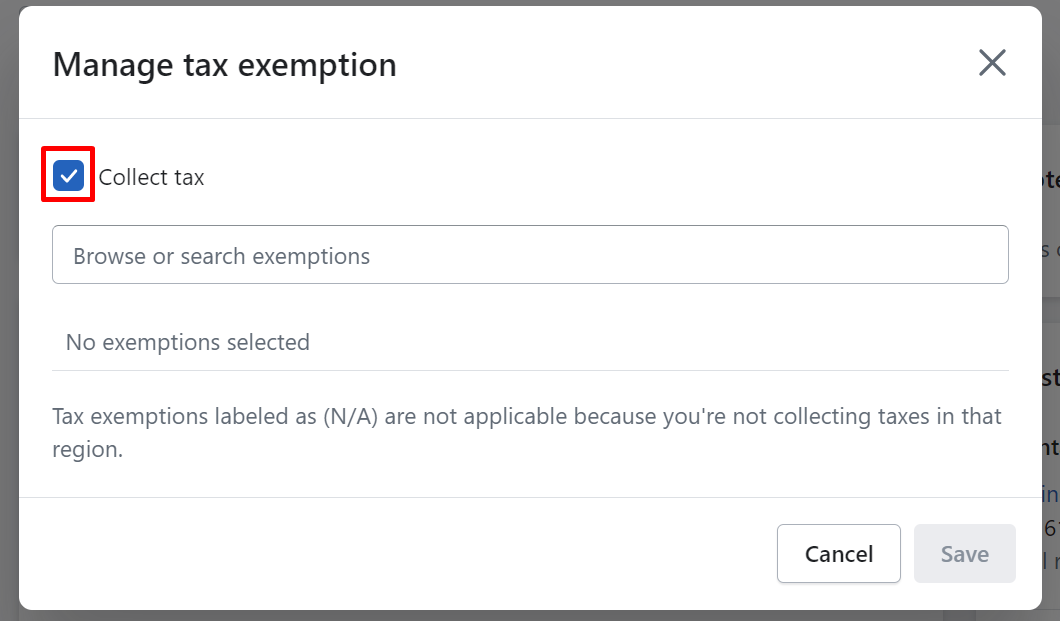
- Click Save.
By following these steps, you can effectively configure tax exemptions and overrides for your Shopify store, ensuring compliance with regional tax laws and regulations. If you still find these steps difficult, let’s find an agency like Magenest providing Shopify development services to help you set up Shopify taxes successfully.
Or you can directly follow each step in our full guide video on how to configure taxes in Shopify. Follow along with our step-by-step guide to ensure your store complies with tax regulations, providing a smooth shopping experience for your customers.
Collecting Shopify Sales Tax
Include Taxes in Product Prices
When selling products online, it’s essential to comply with tax regulations and display accurate pricing for customers. In some countries, like the United Kingdom, merchants are required to include sales tax in the displayed prices of most items. By following a few simple steps, Shopify store owners can easily include taxes in their product prices to ensure a seamless and compliant shopping experience for customers.
To include taxes in product prices, follow these steps:
- Go to your Shopify admin and navigate to Settings > Taxes and duties.
- Check the box that says All prices include tax.
- Click Save.
Keep the Charge tax on this product option checked on your product pages to ensure taxes are included in the displayed price. Customers will see the included tax amount next to the total at checkout.
Please note that including taxes in product, prices does not affect your tax reporting. Additionally, if a customer is tax-exempt, but you use tax-included pricing, they will still be charged the full listed product price (tax included).
Shopify Tax Overrides for Special Cases
Setting up Shopify taxes for Digital products
Digital products, such as downloadable files or electronically supplied items, are subject to value-added tax (VAT) in the EU based on the customer’s location, regardless of the seller’s location. EU legislation defines digital products as broadcasting, telecommunications, and electronically supplied services, excluding online gift cards. To charge VAT correctly, merchants can either register for VAT in each EU country where they do business or register for the Mini One-Stop-Shop (MOSS) in an EU member country or region. Some tax authorities require collecting and recording two pieces of evidence of a buyer’s location, such as billing address and IP address. Consult a tax expert to understand regional requirements and ensure compliance.
Setting up Shopify taxes for shipping
Charge tax on shipping rates is a requirement in some countries, including certain US states, India, and Singapore. Even if the shipping cost is included in the product price, taxes may still need to be charged and displayed separately on invoices.
- Log in to your Shopify admin.
- Navigate to the Settings tab and select Taxes and duties.
- Check the box next to Charge tax on shipping rates.
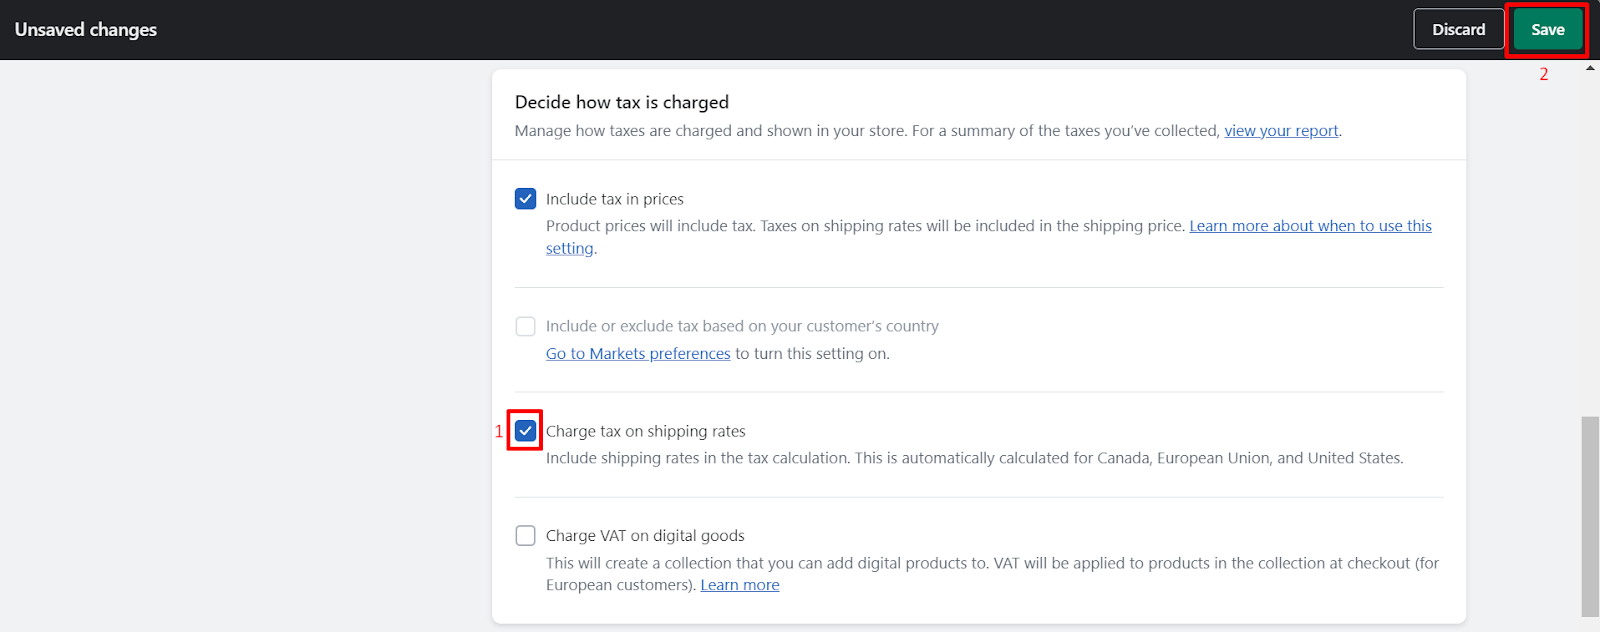
- Save your changes.
Once you have completed these steps, taxes will be charged on the shipping rates for orders that are created after the setting has been enabled. It is important to note that any changes made to your tax settings will only affect new orders and invoices. Existing invoices will remain unaffected.
Setting up Shopify taxes for International orders
To collect international duties and import taxes at checkout, your Shopify store needs to meet certain requirements, such as
- Being on the Advanced Shopify or Shopify Plus plan
- Using a shipping service other than Shopify Shipping
- Having HS codes applied to products.
If your store does not meet these requirements, you can use a third-party app to calculate duties and import taxes. There is a transaction fee for orders that have duties and import taxes calculated, depending on whether you use Shopify Payments or a third-party payment provider.
Collect duties and import taxes on international orders at checkout
- From the Shopify admin, go to Settings > Markets.
- Click Manage next to the market where you want to collect duties and import taxes at checkout.
- In the Duties and import taxes section, click Manage.
- Select the shipping countries or regions where you want to collect duties and import taxes at checkout.
- Review products that have been flagged as missing HS codes and a country or region of origin and add the missing information to ensure that duties and import taxes are calculated accurately.
- Confirm that your shipping carriers and third-party integrations support DDP shipping labels.
- Confirm that you’ve updated your store policy and notifications for international sales.
- Review the terms and conditions for calculating duties and international taxes at checkout.
- Click Agree and activate.
- Review the additional tasks to complete to set up your store for international sales.
Note that duties and import taxes are charged only on international orders, and orders from regions where you have a fulfillment location are not affected.
Third-party Tax Calculation Apps
Shopify recommends a number of tax-calculating apps, here, we will highlight some of them as examples, you can find out more about these recommendations here.
QuickBooks, Xero sync ‑ Synder
Synder is a powerful accounting automation solution that allows you to seamlessly sync your Shopify store sales data with QuickBooks or Xero. With Synder, you can easily reconcile your books, accurately track taxes, and improve financial visibility. Synder supports multi-currency, unlimited historical imports, and syncs inventory and COGS to your books.
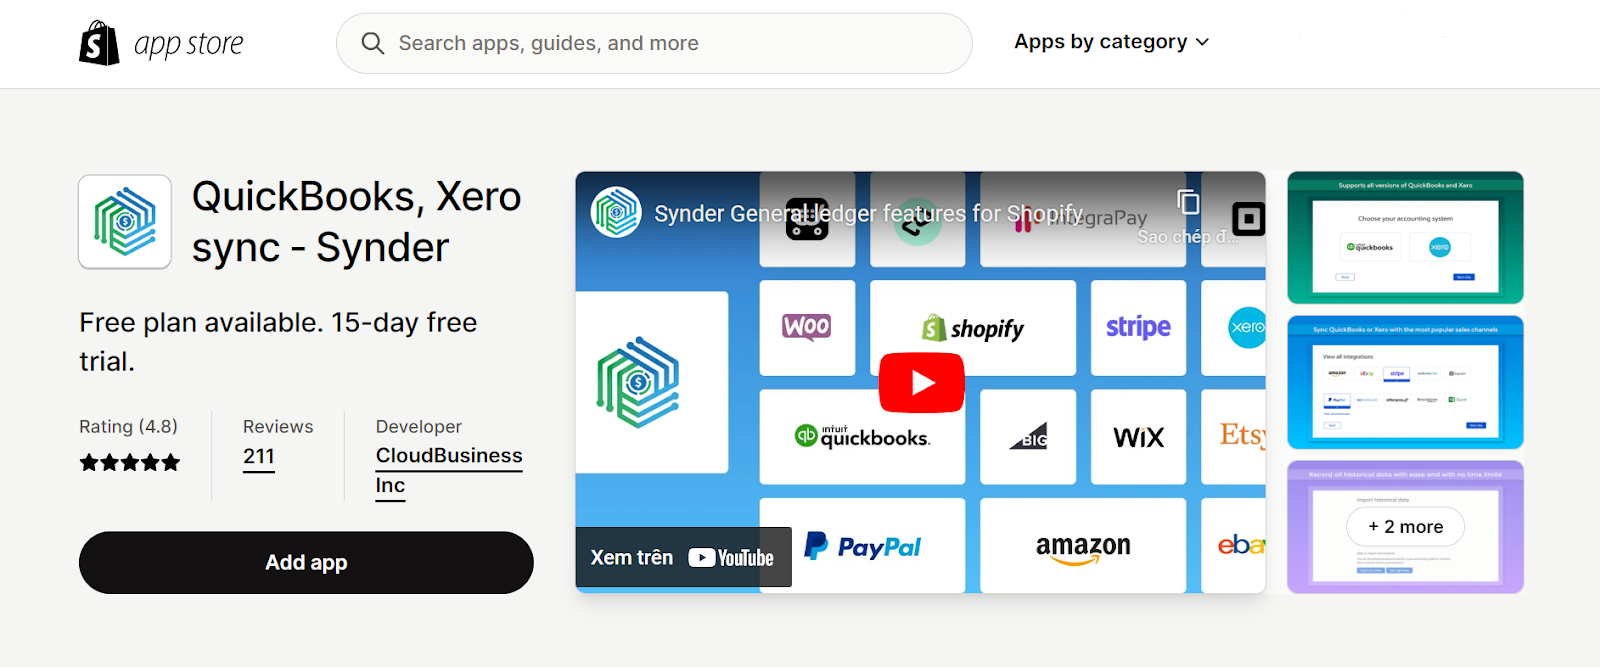
Whether you’re a Shopify merchant or an accounting professional, Synder’s real-time synchronization will save you time on bookkeeping and simplify your reconciliation process. Plus, with access to Synder’s directory of accounting professionals specializing in Shopify, you’ll always have the support you need to confidently manage your finances. Try Synder today with a 15-day free trial.
Sufio: Professional Invoices
Sufio is a professional invoicing solution trusted by merchants in 75 countries. With Sufio, you can automatically create and send invoices, credit notes, receipts, and reminders while staying compliant with legislation in over 50 countries. Impress your customers with customizable invoice templates that include your logo, brand colors, and premium fonts.
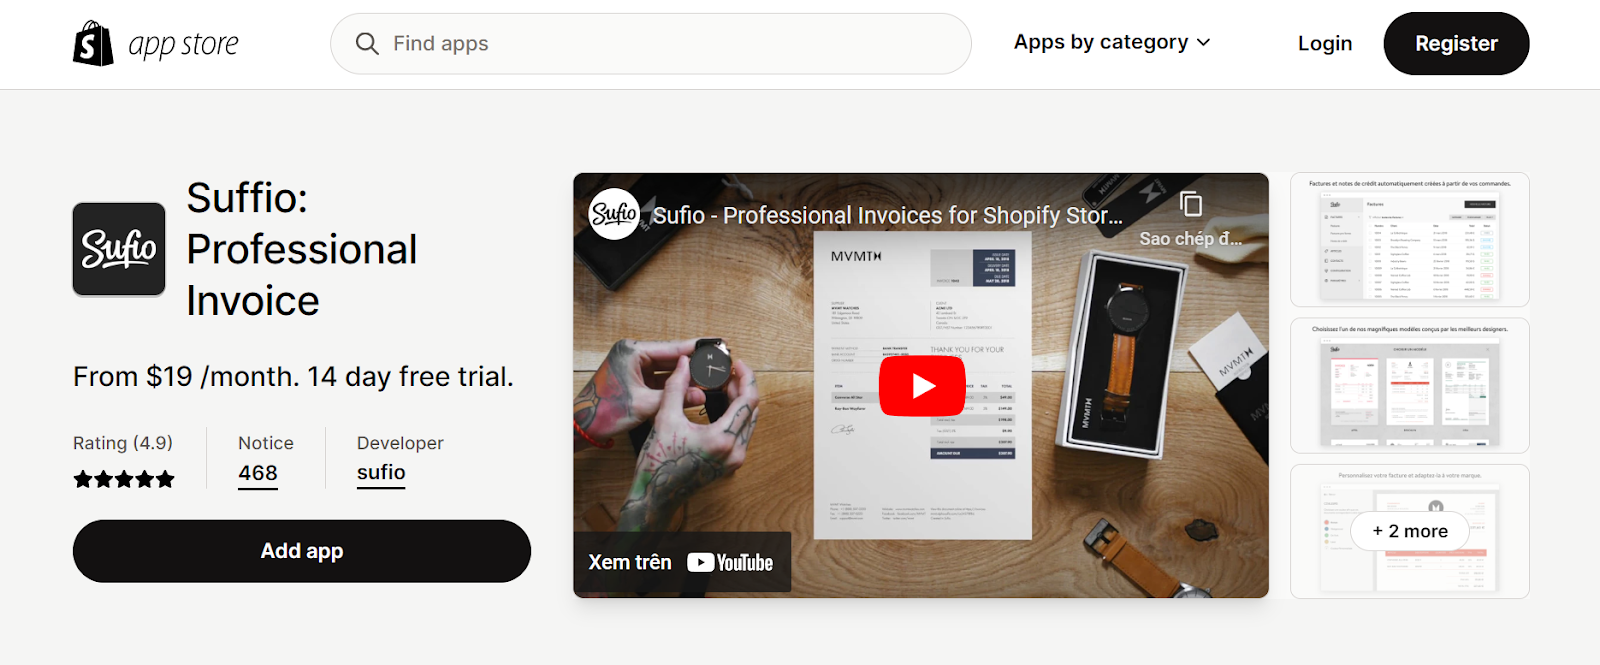
With the ability to validate EU VAT numbers and set customers as tax-exempt, Sufio also allows you to sell B2B. And with a 14-day free trial, you can see how Sufio’s powerful custom workflows can cater to your business needs. Choose from their BASIC, STANDARD, PREMIUM, or ENTERPRISE plans, which include features such as unlimited invoices, multiple languages and currencies, and priority support. Let Sufio help you build your brand and ensure your documents meet worldwide regulations for both B2C and B2B sales.
DRINKS
DRINKS is a cutting-edge tax and regulatory solution designed specifically for alcohol producers and retailers to effortlessly scale their online sales and deliver exceptional customer experiences on Shopify. Seamlessly integrated into the native Shopify checkout process, DRINKS empowers merchants to leverage the full potential of the Shopify ecosystem with its robust, fully customizable, and worry-free tax and compliance features.
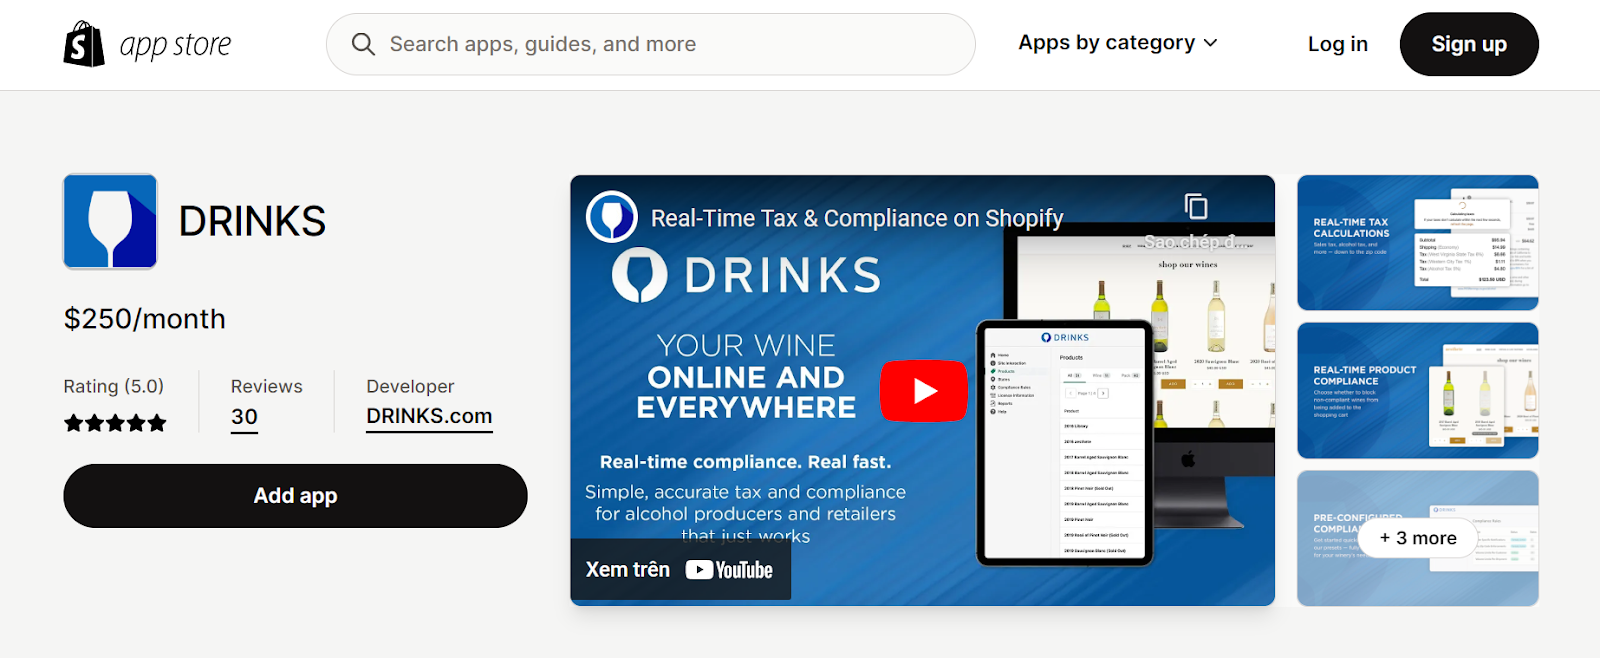
With hundreds of pre-configured compliance rules that are automatically updated, real-time age verification approved by each state, dynamic store customizations, and comprehensive report generation for state tax filings, DRINKS provides a streamlined solution for alcohol sales. Starting at $250/month, DRINKS offers flexible pricing plans based on your monthly sales, ensuring a cost-effective and reliable solution for all your alcohol tax and compliance needs.
Generating Shopify Tax Reports
Shopify offers various reports to assist merchants in filing and remitting their taxes. Tax reports and sales finance reports are two essential reports that can provide merchants with valuable insights into their tax and sales data.
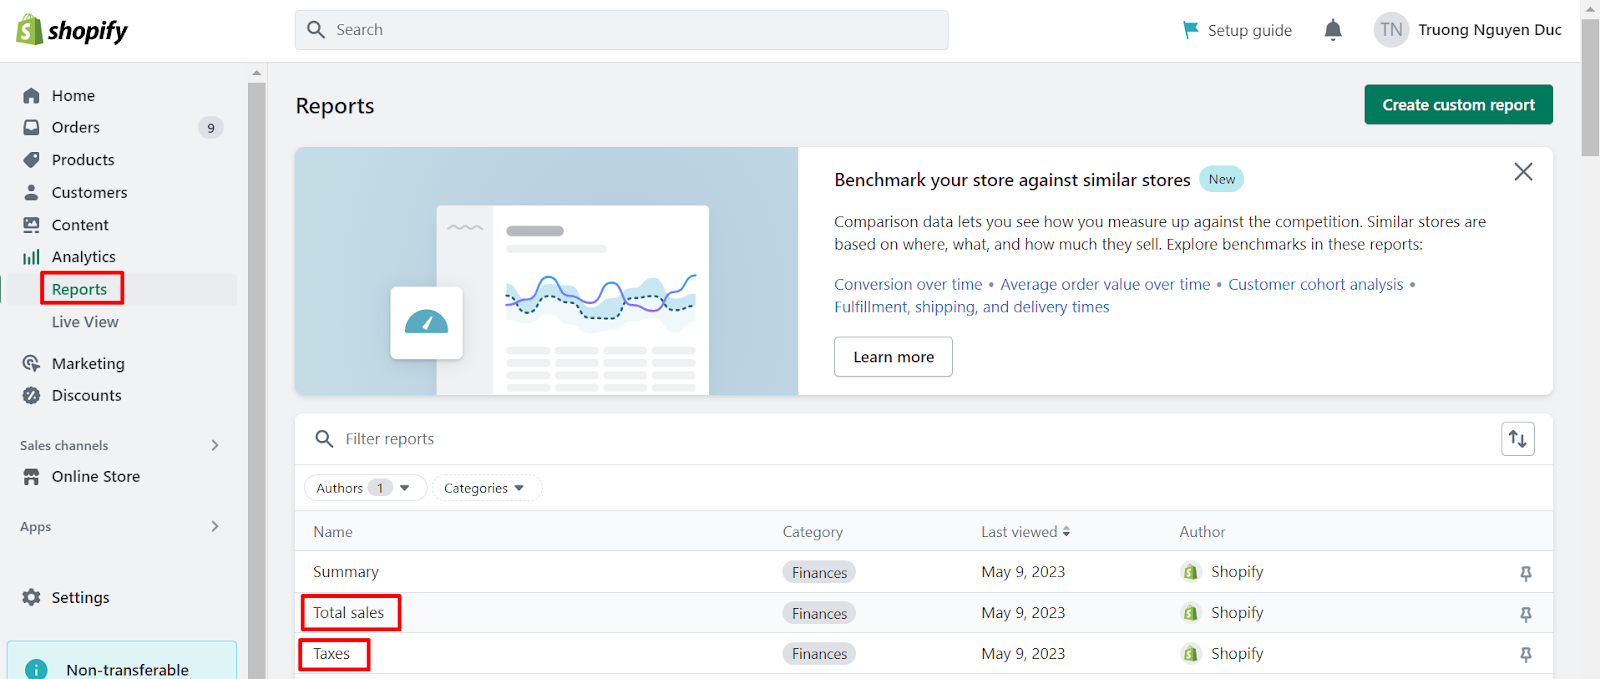
The Tax Finance Report will provide a summary of sales taxes applied to your sales. To access this report, go to Reports in your Shopify admin and select Taxes. On another hand, the Sales Finance Report can help with sales tax reporting and provides information such as order amounts, taxes, POS, billing, and shipping locations. To access the Sales Finance Report, go to Reports in your Shopify admin and select Total Sales. And to maximize the potential of this report, ensure that you select the correct time period (such as the calendar year) and select Full Report when you export it.
These reports will help merchants in obtaining the necessary information required for filing their tax returns and provide their accountants with accurate data for financial reporting.
Tax Tips and Best Practices
Keeping Up-to-date with Tax Law Changes
It’s important to stay informed about tax law changes that may affect your business. Tax laws can be complex and constantly changing, so it’s a good idea to stay up-to-date on any updates or revisions. You can do this by regularly checking government websites, attending tax seminars or webinars, and consulting with a tax professional.
Working with Tax Professionals
Working with a tax professional can help ensure that your business stays compliant with tax laws and regulations. Tax professionals can provide guidance on tax planning, prepare tax returns, and provide advice on minimizing tax liability. It’s important to choose a qualified and experienced tax professional who can help you navigate the complexities of tax law.
Automating Tax Calculations and Reporting
Automation can help streamline tax calculations and reporting, saving you time and reducing the risk of errors. Many eCommerce platforms, such as Shopify, offer built-in tax automation features that can handle tax calculations and reporting for you. You can also use third-party tax automation tools to integrate with your accounting software and automatically calculate and report taxes.
Staying Organized with Tax Documentation
Proper record-keeping and organization can help you stay on top of your tax obligations and avoid potential issues with the tax authorities. Keep accurate records of all sales, expenses, and deductions, and make sure you have all necessary documentation on hand. This includes invoices, receipts, bank statements, and other financial records. By staying organized, you’ll be better prepared to file taxes accurately and on time.
Outro
In conclusion, setting up and managing taxes in Shopify can be a complex process, but it is crucial for any business selling online. By following the general steps outlined in this guide, you can ensure that you are collecting and remitting taxes correctly.
However, you may easily encounter many unexpected troubles in the process of configuring your online store taxes. Therefore, we’re here to help. At Magenest, we have a plethora of Shopify specialists, who have a deep understanding of the platform, and market insights, along with years of experience in providing website development services. They are all eager to support you in the journey of creating a successful online business! Don’t hesitate, we are just far from you with one click.