An email is a form of communication between you and your customers. If you want to take the most out of your email, you need to include a logo in the email header. It will help customers to get familiar with your brand and make your email look more professional. Reading an email that has a familiar logo will increase customer confidence in the email and motivate them to act.
In Magento 2, you can upload your logo image in 3 different file formats:
– JPG/JPEG: This type of image has the highest compression rate, allowing you to save your bandwidth when loading images and improve the speed of your store.
– GIF: This image format has higher quality than JPG, however, it supports fewer colors than JPG.
– PNG: this file type support transparency, which is suitable for logos with transparent background, but the file size is a little higher than JPG/JPEG.
We would recommend you stick with PNG or JPG/JPEG and use an image compression tool to reduce your image size without compromising its quality.
When uploading your logo to Magento 2, you will want your images to maintain their high quality across multiple devices. This is because customers will visit your Magento websites through multiple devices, with different screen resolutions. To ensure this, the size of your email image should be at least 3 times larger than specified in the header template.
For example, if your logo size is 150 x 100, you should upload a logo image with a size of 450 x 300.
To produce a high-quality image, you should ask your designer to create it in vector graphic format (.svg, .eps, or .ai). This will allows you to scale your email logo without losing any image quality. After you have enlarged the image to the desired size, you can export it into the image formats mentioned above to upload it to Magento 2.
Remember that there are many elements that take up the space of your header. Therefore, you should try to trim out any wasted space around your logo.
Finally, remember to maintain the resolution of your logo image, since a distorted email logo will look really unprofessional.
Here’s how to change the email logo on Magento 2:
Step 1: Upload your logo.
Step 2: Specify logo dimensions.
Step 3: Choose a header and a footer template.
Step 4: Save the email logo setting.
Here is the detail of all steps:
Step 1: Upload the Email Logo.
- Go to the Magento 2 back-end menu and log in with an admin account.
- On the admin menu, click on Content -> Design -> Configuration.
- You will see a list of store views that the Magento store currently manages. Pick a store view that you want to change the logo design and click on Edit in the Action column.
- A new section will appear. Scroll down your browser to the Other Settings section. You will see a sub-section called Transactional Emails. Click on it.
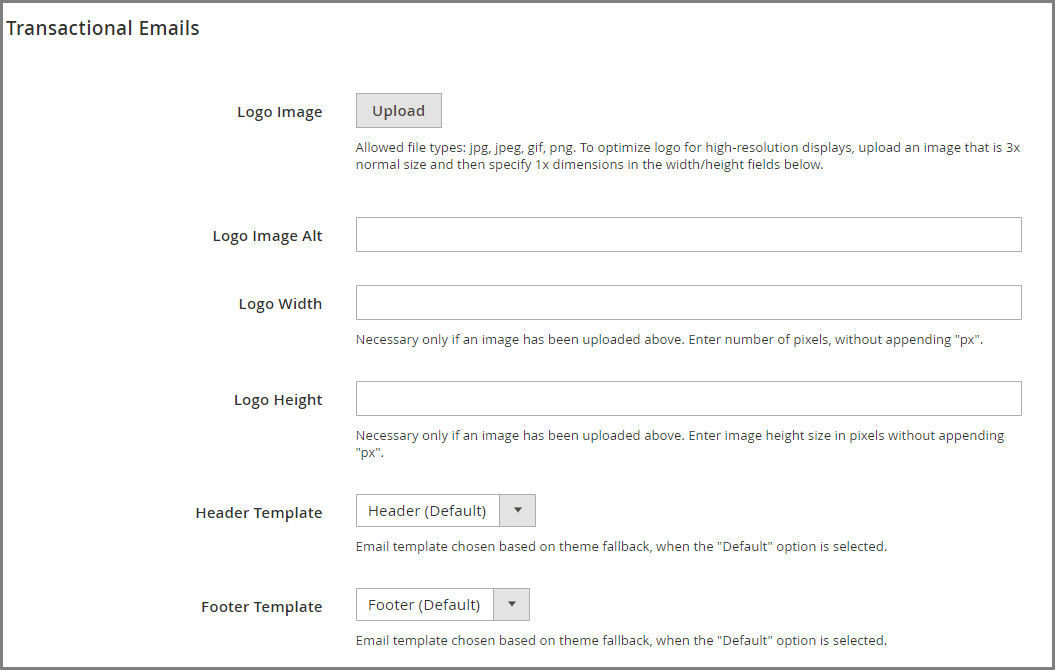
- A list of fields will appear, allowing you to configure the setting for the email logo. Click on upload and locate the logo file on your computer to upload it to Magento 2.
- Specify the dimension for the logo. Enter the width and height that you want the logo to display in your email. The size unit of the image is the pixel, but the Magento system already determines the unit, so you don’t need to enter it yourself.
Step 2: Specify logo dimensions.
Remember to specify the size of the logo. This will dictate the logo size that shows in your email. In addition, when you specify the size of your logo, the email will also load faster.
Step 3: Choose a header and a footer template.
Each email sent from Magento 2 to customers will contain 3 sections: header, content, and footer. If you are using different email header and footer templates for your stores, or different stores you can specify which templates to use in this section.
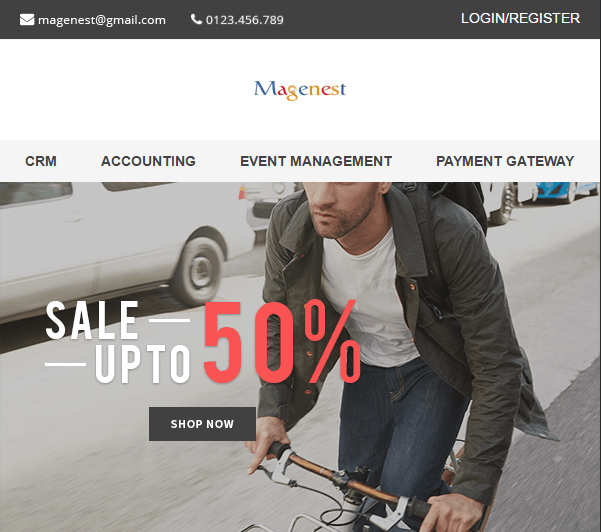
Header: The header of your email is where you often show your logo, contact information as well as navigation elements to your website. For example, the header section of Magenest’s email leads to different product categories on our website.
A good email header provides the most important pages of your website that you want customers to visit, helping you to increase email click-through rate and conversion.
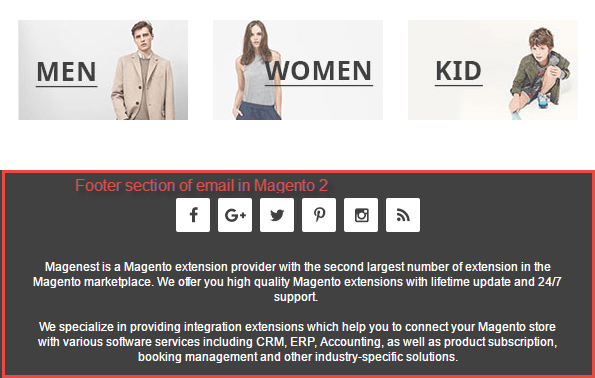
Footer Template: The footer section of your email will show branded elements as well as links to other platforms that your company owns, including social networks, privacy policies, and company information. Good email footer design will help your business to gain the trust of customers.
Step 4: Save your configuration
Once you are done setting your logo image, click on Save Configuration. Now click on Preview in the email templates section to see how your Magento 2 email will show up. Remember that the appearance of an email in the preview mode might not be similar to a real email sent to customers. Therefore, you should try to send the mail to yourself to recheck the template.
Congratulations! You just get through all four steps to set up and change an email logo in Magento version 2.1. Now you can set your own desired email logo to impress and gain points in the eyes of your customers and partners. If you encounter any difficulty in the process of modifying your email logo, don’t hesitate to contact our experts. We have plenty of experienced Magento developers and specialists, who are always ready to support you in time!


