Social login is popular among customers due to a faster registration process (almost no additional information is needed), and you can save the time of remembering all your accounts. However, before creating a social login in Magento 2, you have to connect to the API of other social networks such as Google, Facebook, Yahoo, Instagram, Pinterest, etc. Today, we will show you how to configure Google API in Magento 2.
When entering Twitter, you need to create an external application to connect your website to Google API. Then, application ID and secret (Client ID and secret or API ID and Secret), or application credentials, are all that we need. With this external application, your website will be linked to API. And these credentials play an important role in making Google users get access to your website.
Table of Contents
Prerequisites for Configuring Google API in Magento 2
Before we delve into the configuration process, ensure that you have the following prerequisites in place:
- A Magento 2 store with administrator access
- A Google Cloud Platform account with API access
- API keys for the specific Google services you want to integrate
How to Configure Google API in Magento 2 with 7 Steps
To Configure Google API, let’s follow these steps:
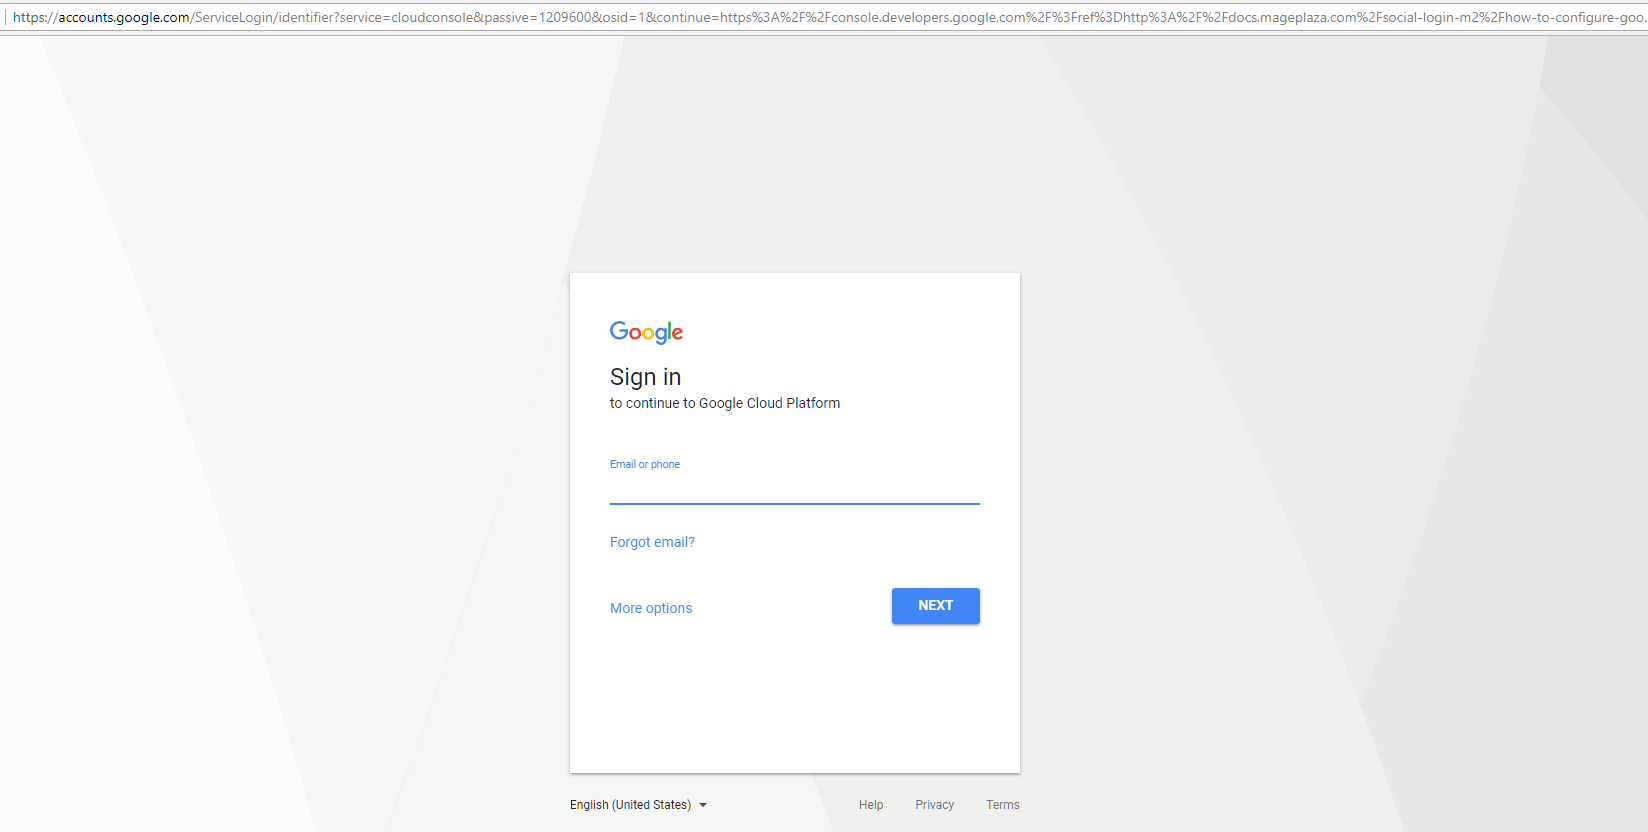
Step 1
Firstly, let’s enter https://console.developers.google.com/ and sign in to your Google account. We start to configure Google API in Magento 2 here.
Step 2
Then, on the Dashboard sidebar, choose Credentials tab which is on the left side, and click Create button to create a new project.

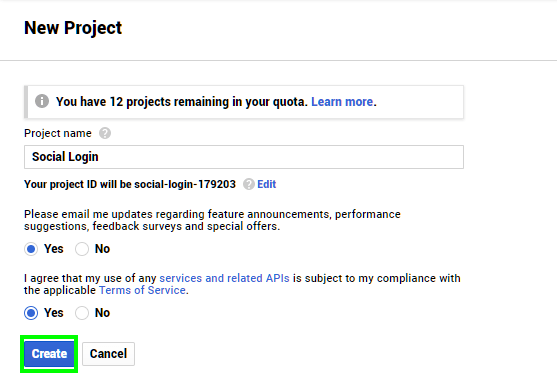
Step 3
Fill in all the fields like the project name, and choose Yes for the two fields below, then click Create.
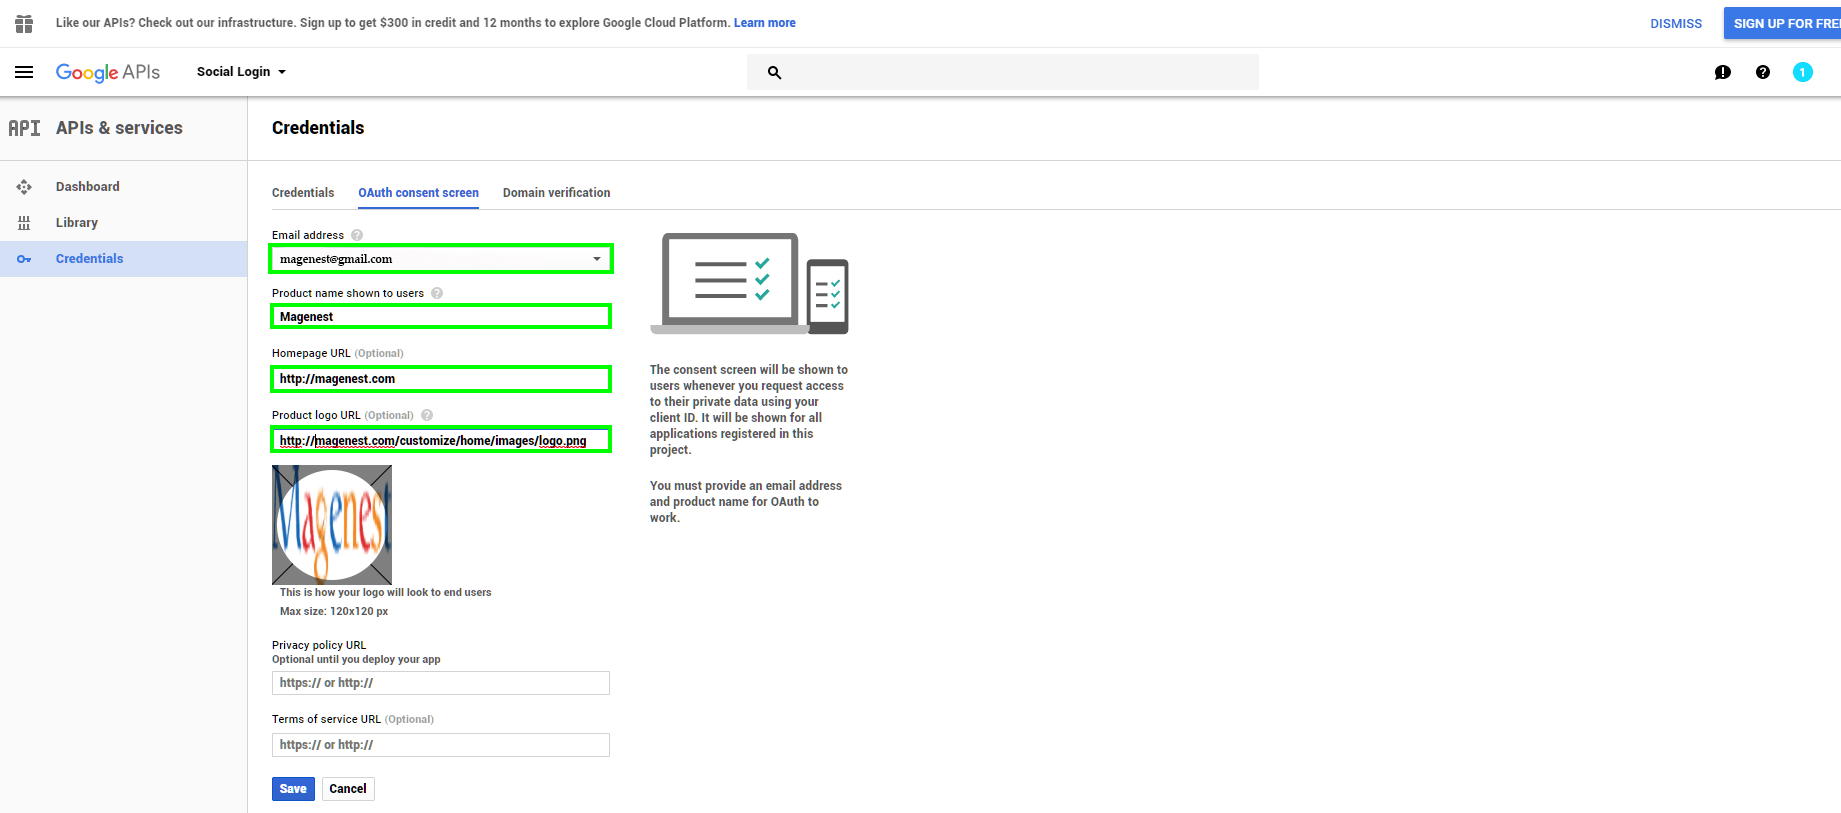
Step 4
After clicking Create button, wait for a minute, choose the tab OAuth consent screen beside Credentials Tab, and then fill in all the information about your website or your product such as Product name, Home page URL, Product Logo URL, etc. After that, press Save.
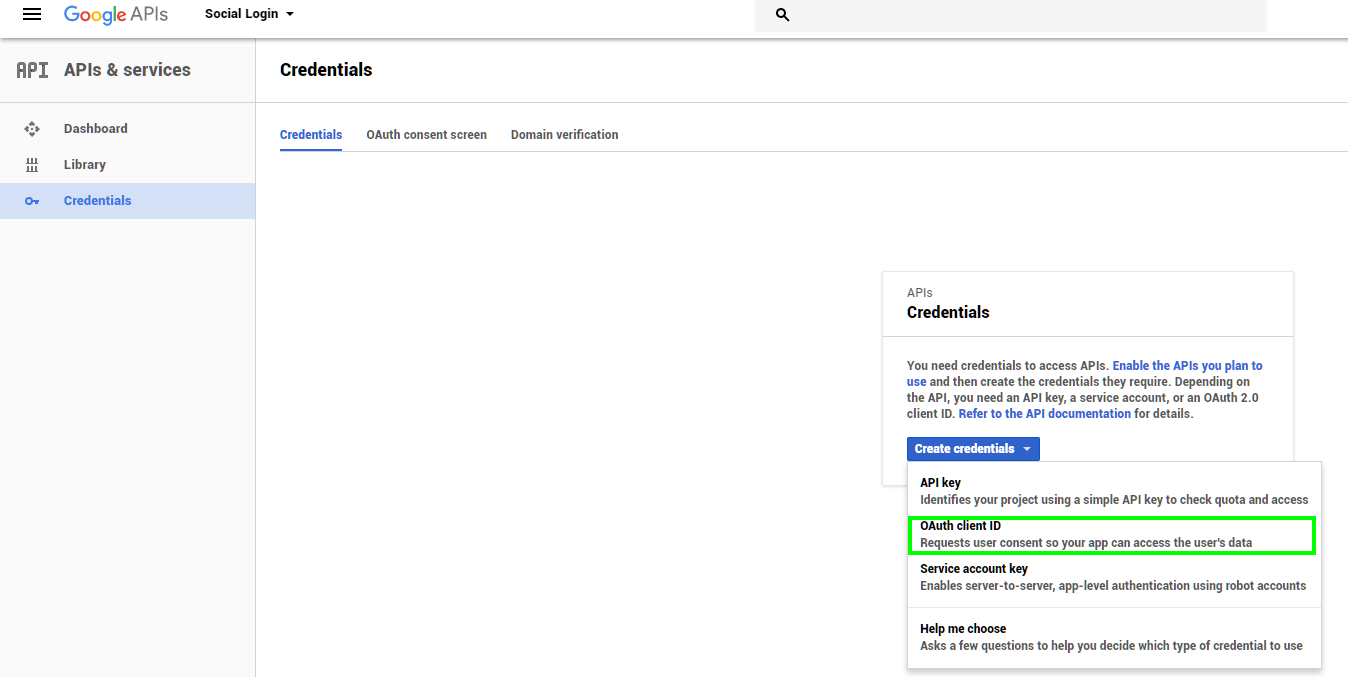
Step 5
In the Tab Credentials, click Create Credentials then choose OAuth Client ID.
On the Create Client Field, choose Web Application as your application type. Next, you continue to fill in the information on names and restrictions. Remember to put your website domain as a requirement to match with the current hostname in the Authorized JavaScript origins field.
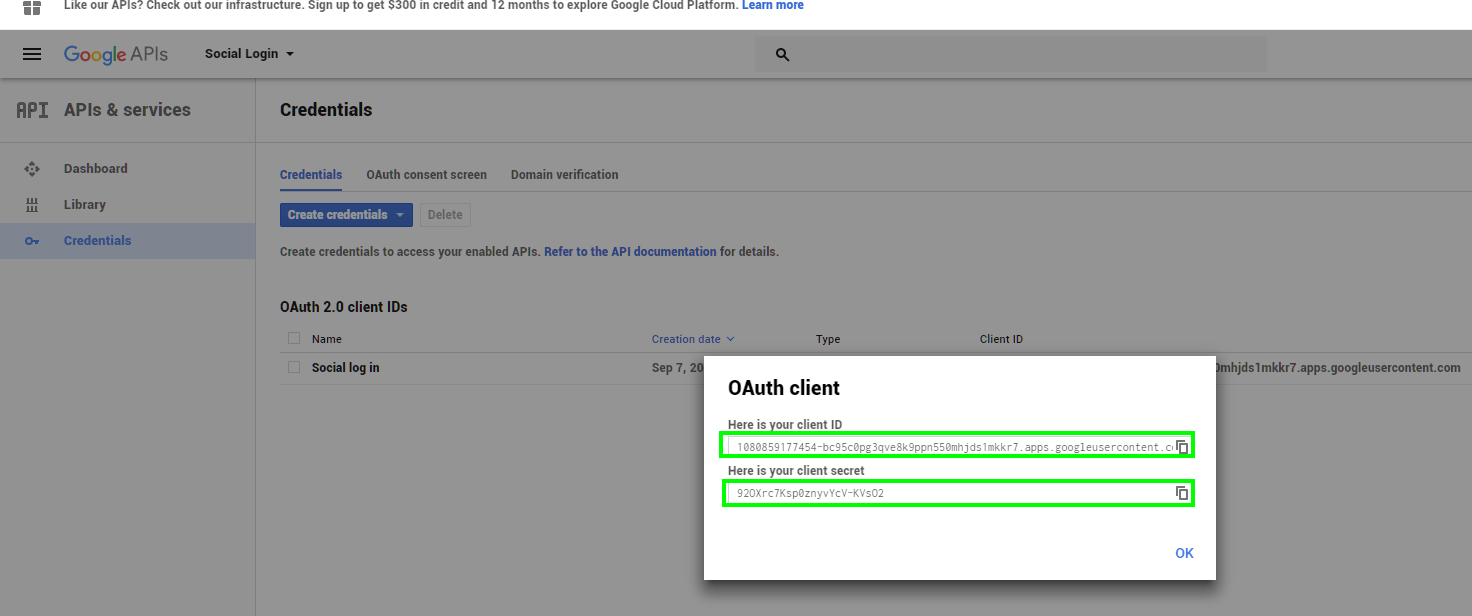
Step 6
After creating a client ID, a pop-up showing your client ID and client secret will appear like the image below.
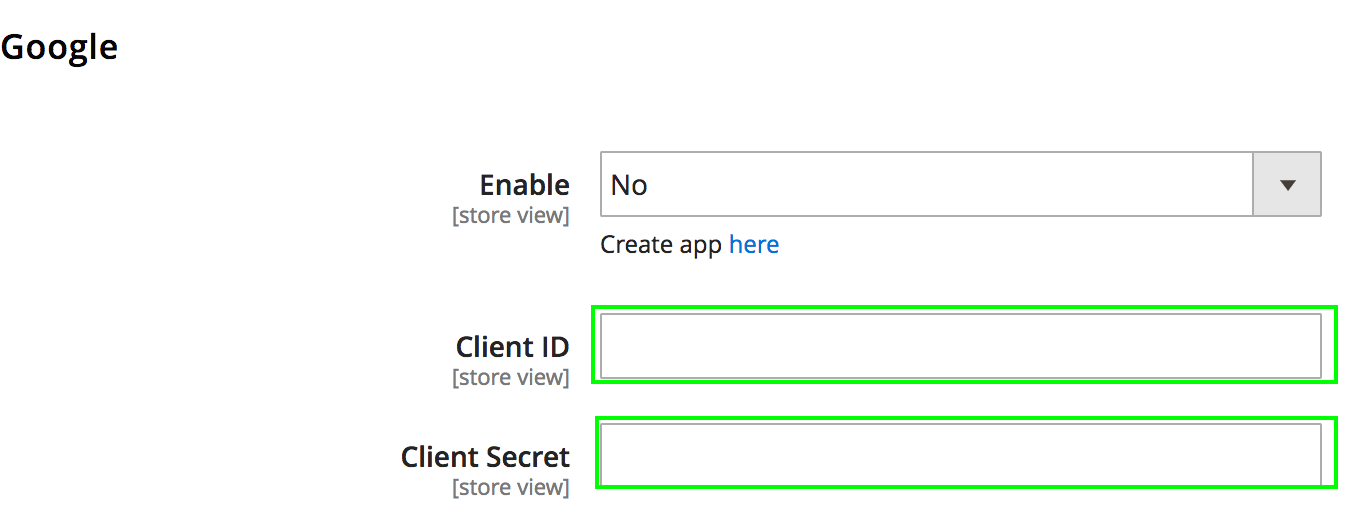
Step 7
Now, after getting your Client ID and secret, copy and paste them into API fields in Magento 2 back-end interface as an admin.
In this post, we have shown you how to configure Google API in Magento 2. If you want to ask for support, contact directly to our Magento experts and specialists.