
CentOS is an enterprise-level server OS used by various companies and corporations across many industries nowadays. Because of its stability and extreme reliability, it is also the choice of many store admins and eCommerce companies. In this blog, I will break down the steps of how to install the new Magento 2 beta on a server running CentOS 7.
Table of Contents
Prerequisites
It is recommended that you have Zend Server 5.6, PHP 5.6.x, or 5.5.x already installed on your server along with its required extensions. MySQL 5.6.x and phpMyAdmin are also needed in order to proceed further.
Pre-installation tweaks
Step 1: Log in to your CentOS server using your SSH authentication.
Step 2: Download Magento 2.

Navigate to your Apache web server’s location:
– $ mv magento2 /var/www/html/
Then use the following command to download a copy of Magento 2 from Github onto your web server’s directory.
– $ wget //codeload.github.com/magento/magento2/tar.gz/1.0.0-beta
Now, you should extract your file. Although not necessary, it is recommended that you should change it’s name for easier later use.
– $ tar -xzvf magento2-1.0.0-beta.tar.gz
– $ mv filename magento2
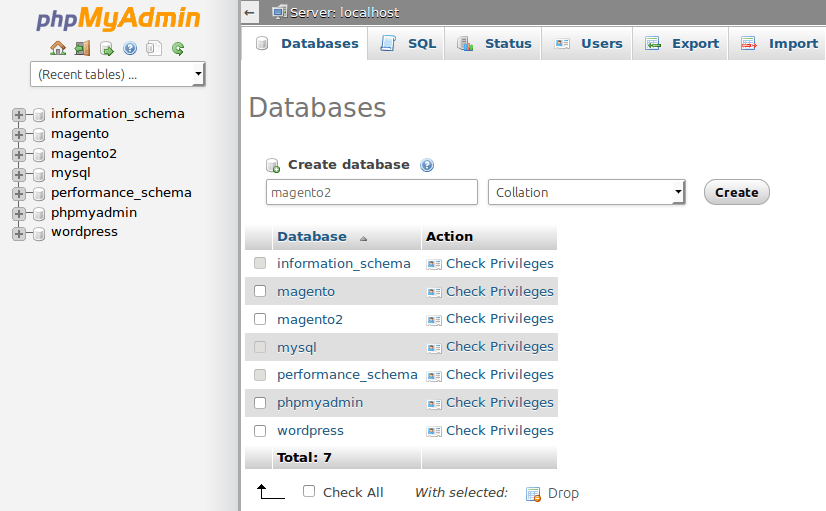
Step 3: add a custom database
Now you will have to add a database named “magento2” in phpMyAdmin. After that, your databases should look like this:
Step 4: Edit your PHP environment
Any application using PHP as its programming language uses the php.ini file as its default configuration file. Because Magento 2 is a big platform and some resources will be a bit excesssively used, it is highly recommended that you edit some variables to prevent later troubles.
Navigate to your location of php.ini file in your webserver using:
– $ cd /usr/local/zend/etc
Open your php.ini file using
– $ vi php.ini
At this point, you can see the content of the file displayed in terminal, look for the variables below and modify them to appropriated values as following:
– max_execution_time=3000: maximum timein seconds a script is allowed to run before being terminated by the parser. The default value of this variable is 30.
– memory_limit=1024M: maximum amount of memory that a script can consume. The default value is 128M.
– post_max_size=200M: maximum suze of a POST data that PHP will accept. The default value is 8M.
– upload_max_filesize=200M: maximum allowed size for uploaded files. The default value is 2M.
After you’re done, hit left button and type “q” and Enter to complete.
Step 5: Edit httpd.conf
Just like Apache, httpd.conf is used by Zend to store information of various functions of the sever. These functinos can be edited by removing or adding a number sign “#” at the beginning of line.
Navigate to /etc/httpd/httpd.conf and edit the file as following:
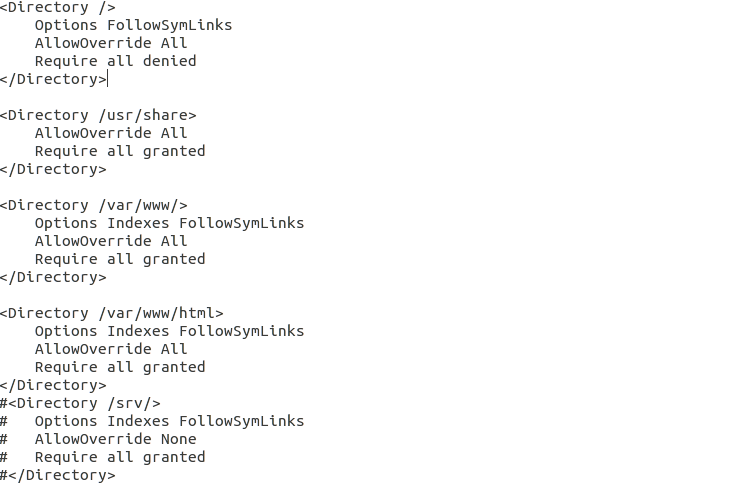
When done, save your file and restart your server.
Installing steps
Step 1: Install composer
Enter the following lines into your terminal:
– $ export PATH=$PATH:/usr/local/zend/bin
– $ php -r “readfile(‘//getcomposer.org/installer’);” | php
– $ mv composer.phar /usr/local/bin/composer
Step 2: Install Magento 2 via Composer
– Set permission for your magento2 folder: $ chmod -R 777 /var/www/html/magento2
– Navigate to magento 2 folder : $ cd /var/www/html/magento2
– Install : $ composer install
Your terminal should look like this:

Step 3: Finish your setup
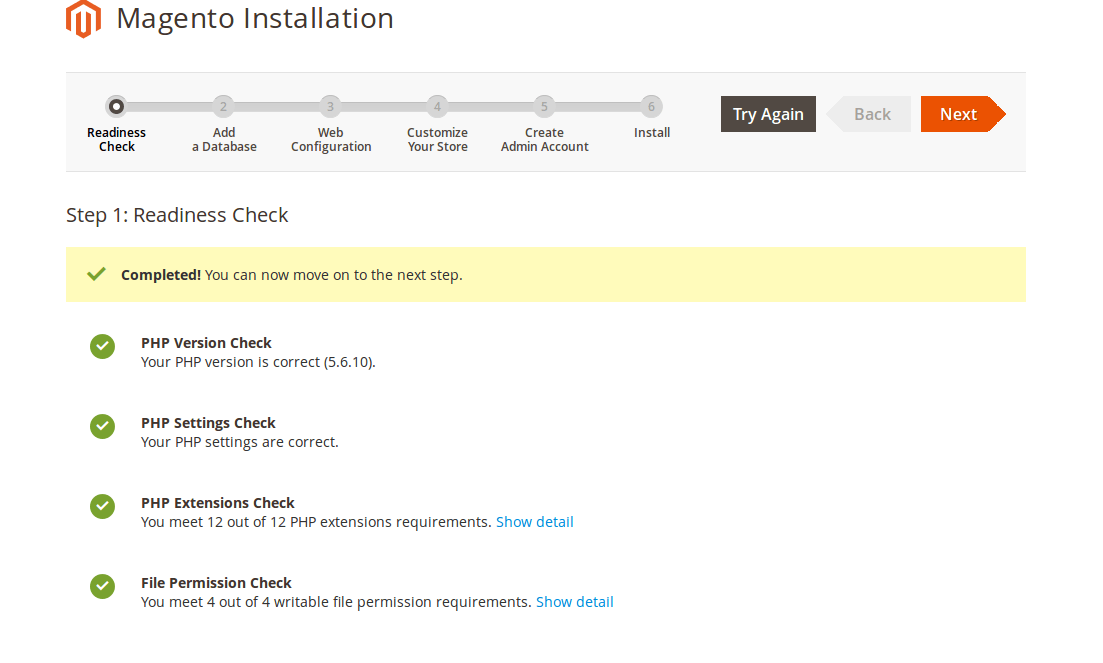
– Go to your Magento site: your_server_ip/magento2, you should see a welcome screen. Click on Agree and Setup Magento to start.

– Magento will now check your machine to see if some requirements are met. Hit Next when done.
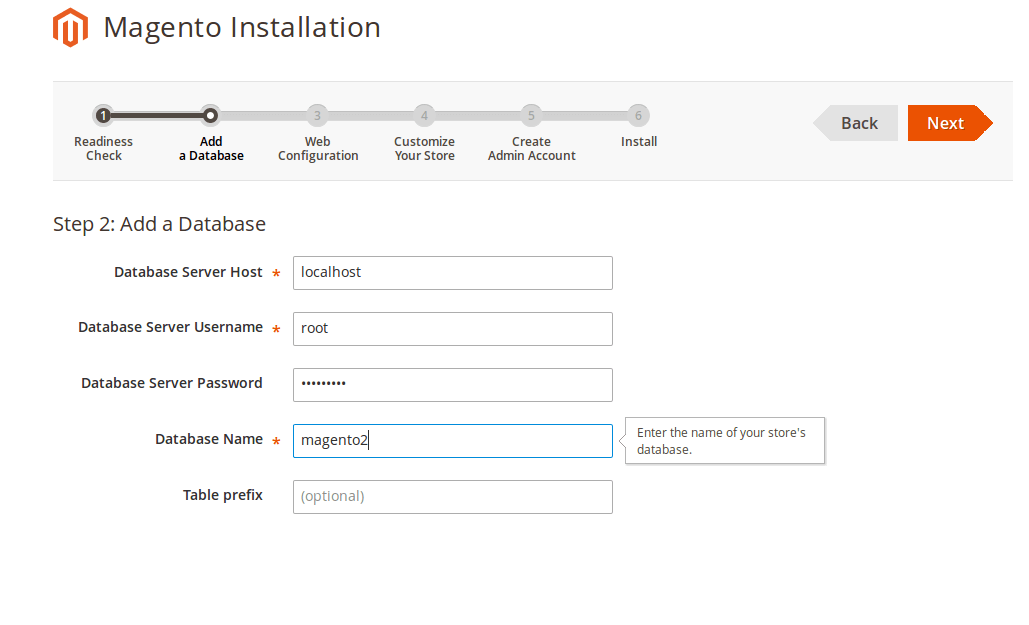
– Enter your database’s information. Hit Next when done.
– After that, Magento will prompt your to enter your site’s info. Hit Next when done.
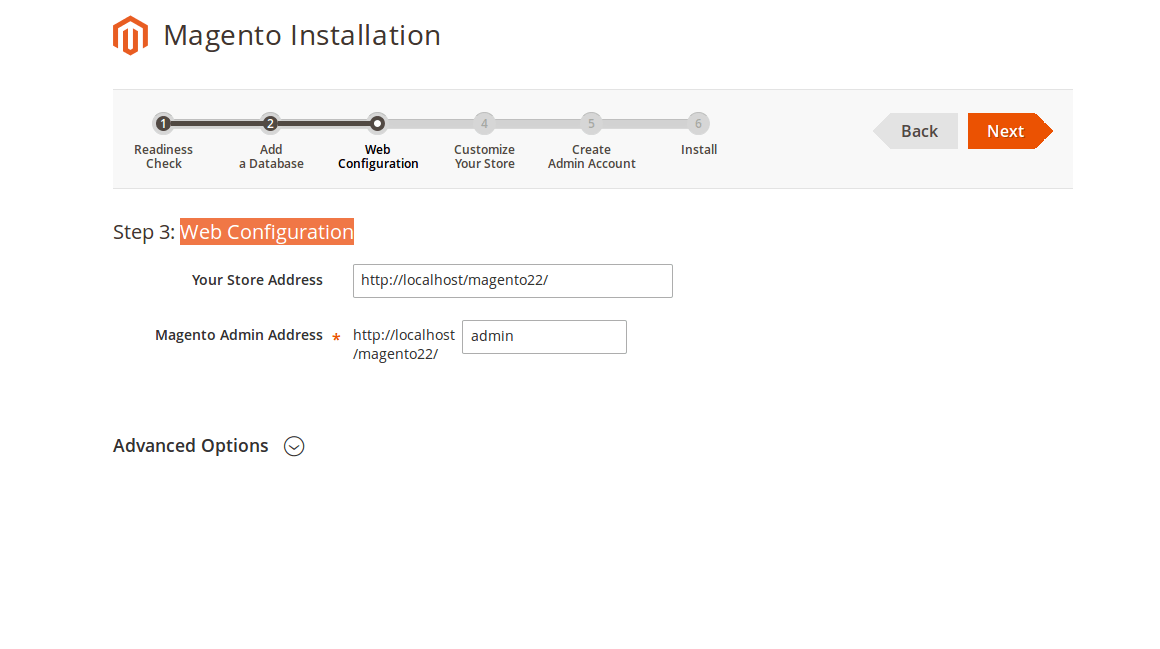
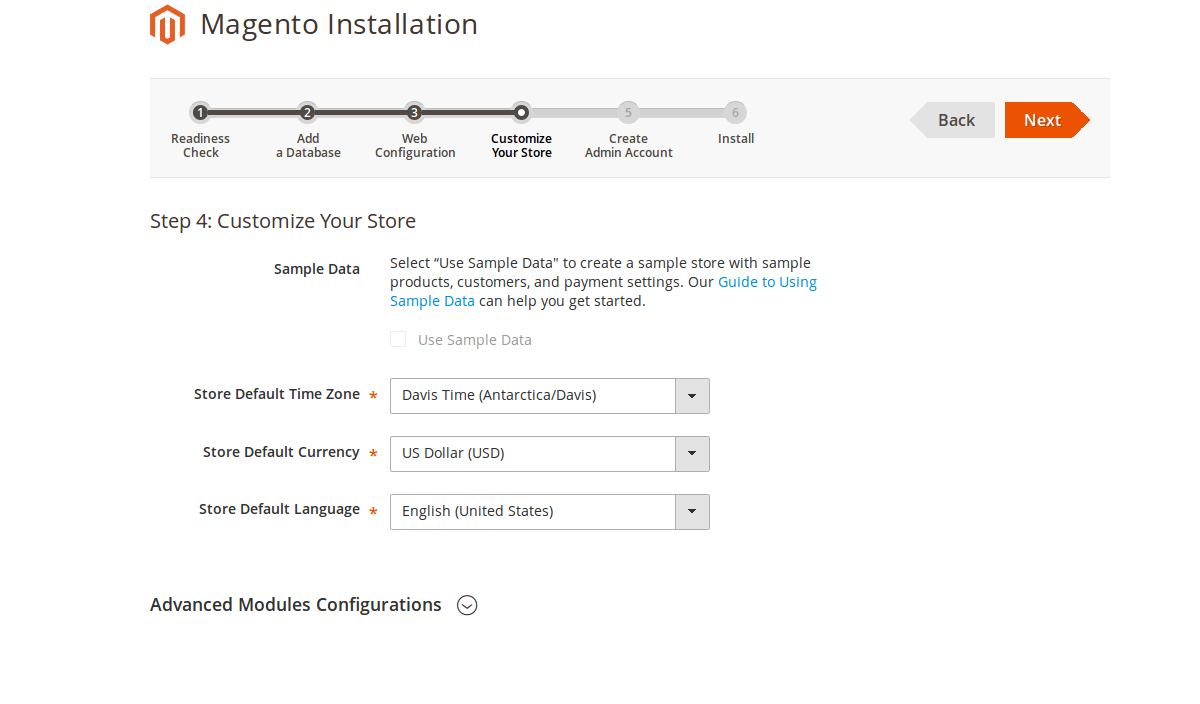
– Enter some more info on the location and language of your store. Hit Next when done.
– Next, enter your new admin account info. Hit Next when done

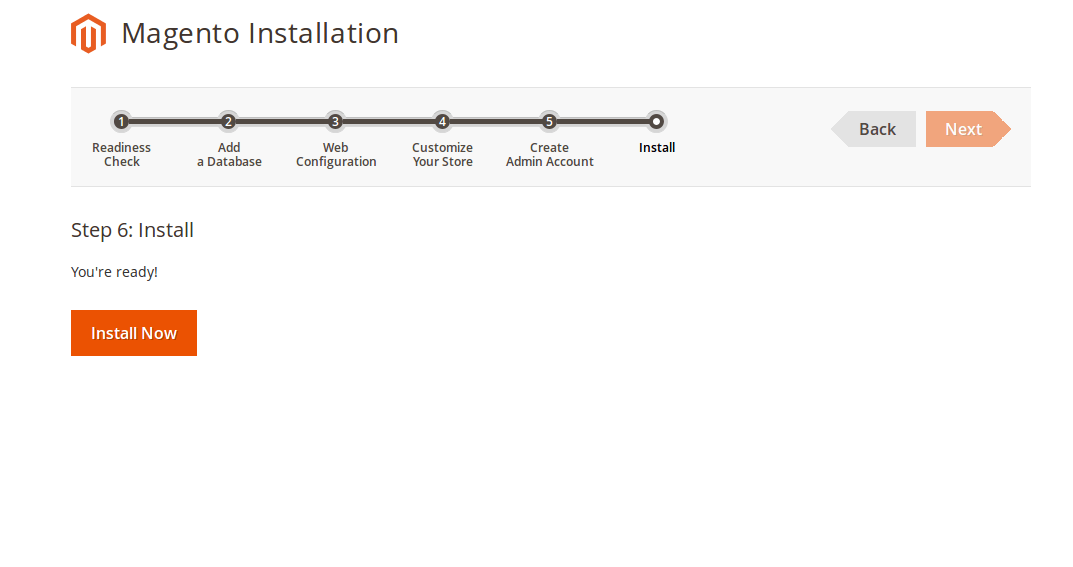
– Hit Install Now to finish your setup.
– Go to your Magento admin site. Your new site should look like this:
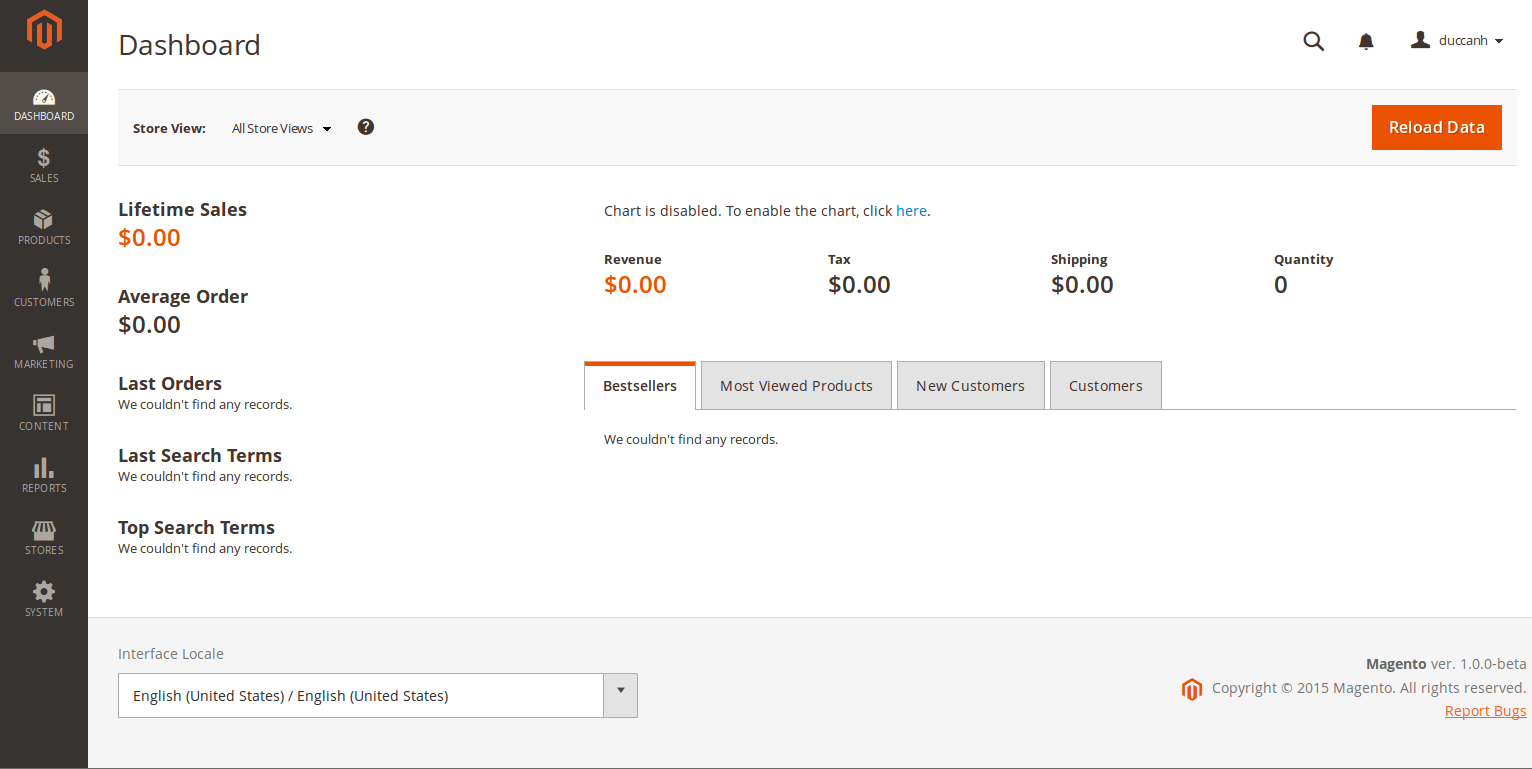
Congratulations, you have successfully installed your Magento 2 store on your CentOS server. You can install the sample data for the frontend view, and we will cover that topic in a later blog.