Widget is a manageable component of Magento 2, which allows users to display data anywhere on their own front-end site.

So are you looking for the way how to create a widget in Magento 2?
You’re welcome!
In this blog, I would like to share with you the detailed procedure of adding a custom widget that can show a list of Instagram photos on your store’s front-end as a particular example for my instruction.
Table of Contents
How to Create a widget in Magento 2 in 5 steps
Step 1: Setting up Module
First, we need to create a custom module.
- Create a registration file: your_magento_base/app/code/Magenest/InstagramShop/resgistration.php
<?php
\Magento\Framework\Component\ComponentRegistrar::register(
    \Magento\Framework\Component\ComponentRegistrar::MODULE,
    'Magenest_InstagramShop',
    __DIR__
);
- Create file: your_magento_base/app/code/Magenest/InstagramShop/etc/module.xml
<config xmlns:xsi="//www.w3.org/2001/XMLSchema-instance" xsi:noNamespaceSchemaLocation="urn:magento:framework:Module/etc/module.xsd">
    <module name="Magenest_InstagramShop" setup_version="1.0.0">
        <sequence>
            <module name="Magento_CatalogWidget"/>
        </sequence>
    </module>
</config>
- Create file: your_magento_base/app/code/Magenest/InstagramShop/composer.json
{
  "name": "magenest/module-instagram-shop",
  "description": "N/A",
  "require": {
    "php": "~5.5.22|~5.6.0|7.0.2|7.0.4|~7.0.6"
  },
  "type": "magento2-module",
  "version": "1.0.0",
  "license": [
    "OSL-3.0",
    "proprietary"
  ],
  "autoload": {
    "files": [
      "registration.php"
    ],
    "psr-4": {
      "Magenest\\InstagramShop\\": ""
    }
  }
}
Step 2: Declare new Widget
Initialize your widget by creating the file : Magenest/InstagramShop/etc/widget.xml
<?xml version="1.0" encoding="UTF-8"?>
<widgets xmlns:xsi="//www.w3.org/2001/XMLSchema-instance"
         xsi:noNamespaceSchemaLocation="urn:magento:module:Magento_Widget:etc/widget.xsd">
    <widget id="instagram_photo_slider"
            class="Magenest\InstagramShop\Block\Photo\Slider"
            placeholder_image="Magento_Widget::placeholder.gif">
        <label translate="true">Instagram Slider</label>
        <description translate="true">List of Photos on Instagram Account</description>
        <parameters>
            <parameter name="title"    xsi:type="text"    required="true" visible="true">
                <label translate="true">Title</label>
            </parameter>

            <parameter name="template" xsi:type="select" required="true" visible="true">
                <label translate="true">Template</label>
                <options>
                    <option    name="default" value="slider/slider.phtml" selected="true">
                        <label translate="true">Photo List slider</label>
                    </option>
                </options>
            </parameter>
        </parameters>
    </widget>
</widgets>
- As in this file, the class=”Magenest\InstagramShop\Block\Photo\Slider” is the block file we’re gonna create later, and value=”slider/slider.phtml” is the widget’s template file.
Step 3: Add Widget Block
Follow this path Magenest/InstagramShop/Block/Photo and create a file named Slider.php to add block class for our widget:
<?php
namespace Magenest\InstagramShop\Block\Photo;

class Slider extends \Magento\Framework\View\Element\Template
{
    /**
     * @var \Magenest\InstagramShop\Model\PhotoFactory
     */
    protected $_photoFactory;

    /**
     * Slider constructor.
     * @param \Magento\Framework\View\Element\Template\Context $context
     * Paramus \Magenest\InstagramShop\Model\PhotoFactory $photoFactory
     * @param array $data
     */
    public function __construct(
        \Magento\Framework\View\Element\Template\Context $context,
        \Magenest\InstagramShop\Model\PhotoFactory $photoFactory,
        array $data = []
    ) {
        $this->_photoFactory = $photoFactory;
        parent::__construct($context, $data);
    }

    /**
     * @return $this
     */
    public function getPhotos()
    {
        return $this->_photoFactory->create()
            ->getCollection()
            ->setOrder('id', 'DESC')
            ->setPageSize(30)
            ->setCurPage(1);
    }
}
- This is where we’re gonna call to get some Images Data to display.
Step 4: Create Widget Template
File template: Magenest/InstagramShop/view/frontend/templates/slider/slider.phtml
<?php
/**
 * @var $block \Magenest\InstagramShop\Block\Photo\Slider
 */
$photos = $block->getPhotos();
?>
<div class="block block-photo-slider slider-list">
    <div class="block-title">
        <h2><?php echo $block->getTitle() ?></h2>
    </div>
    <div class="block-content">
        <?php if ($photos->getSize() > 0) { ?>
            <div class="photo-slider">
                <?php foreach ($photos as $photo) { ?>
                    <div class="photo">
                        <a href="<?php echo $photo->getUrl() ?>" target="_blank">
                            <img src="<?php echo $photo->getSource() ?>" alt="image" width="250" height="250"/>
                            <img style="float: left;" src="//i.imgur.com/nZYx1YJ.jpg" alt="likes:" width="27" height="27">
                            <span style="float:left; height: 27px; margin-right: 7px; line-height: 27px; font-size:22px; color:black"><?php echo $photo->getLikes() ?></span>
                            <img style="float: left;" src="//i.imgur.com/fHIOmkv.jpg" alt="likes:" width="27" height="27">
                            <span style="float:left; height: 27px; margin-right: 7px; line-height: 27px; font-size:22px; color:black"><?php echo $photo->getComments() ?></span>
                        </a>
                    </div>
                <?php } ?>
            </div>
        <?php } ?>
    </div>
</div>
- This is where the content of the widget is.
And we’re done for the coding path. Let’s move on with the configuration on the Magento Backend.
Step 5: Configuration and Result
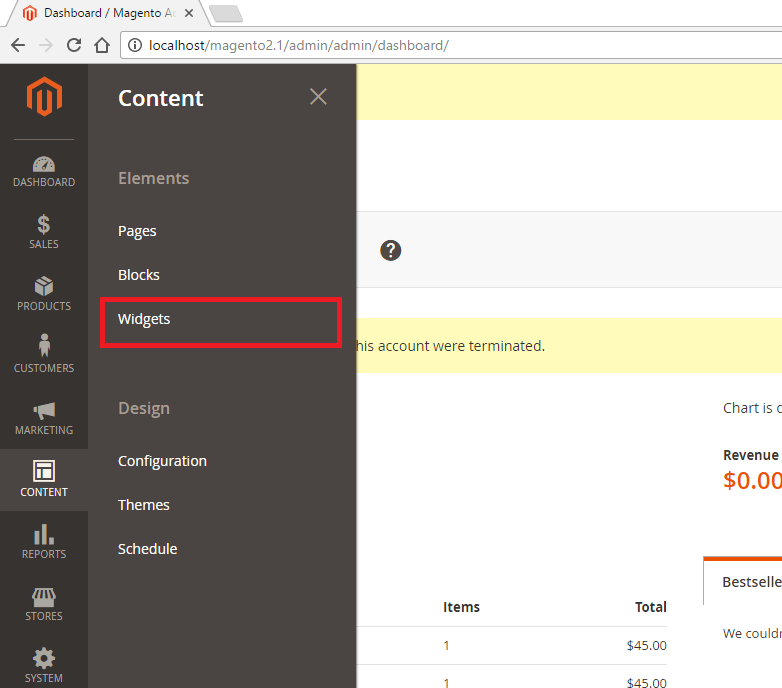
- Go to Magento Backend => Content => Widget => Add new
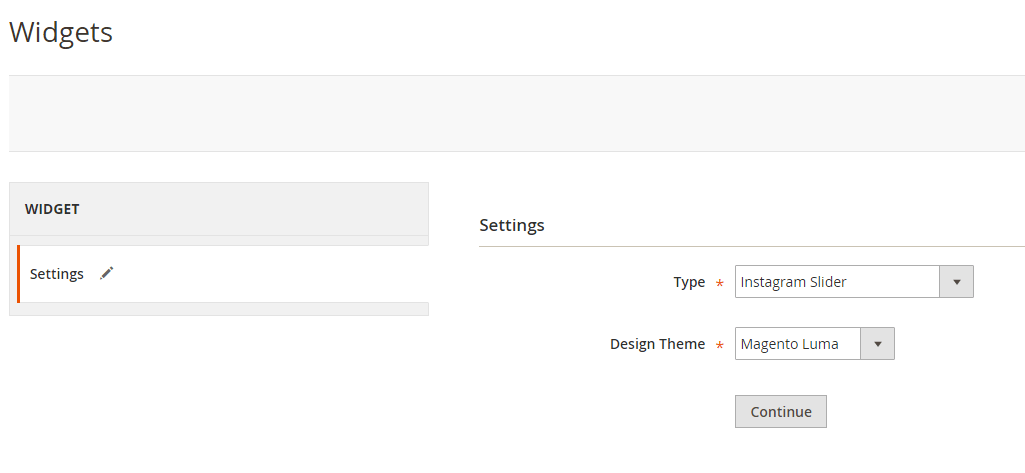
- Choose Type as Instagram Slider and Choose your Design theme.
- This is where you choose to display the Widget. For example, we chose Main Content Top on All Pages.

- On Widget Options tab, enter the title of the widget.

- Press Save, flush your Magento cache and let’s go to your front-end site to see the final result.
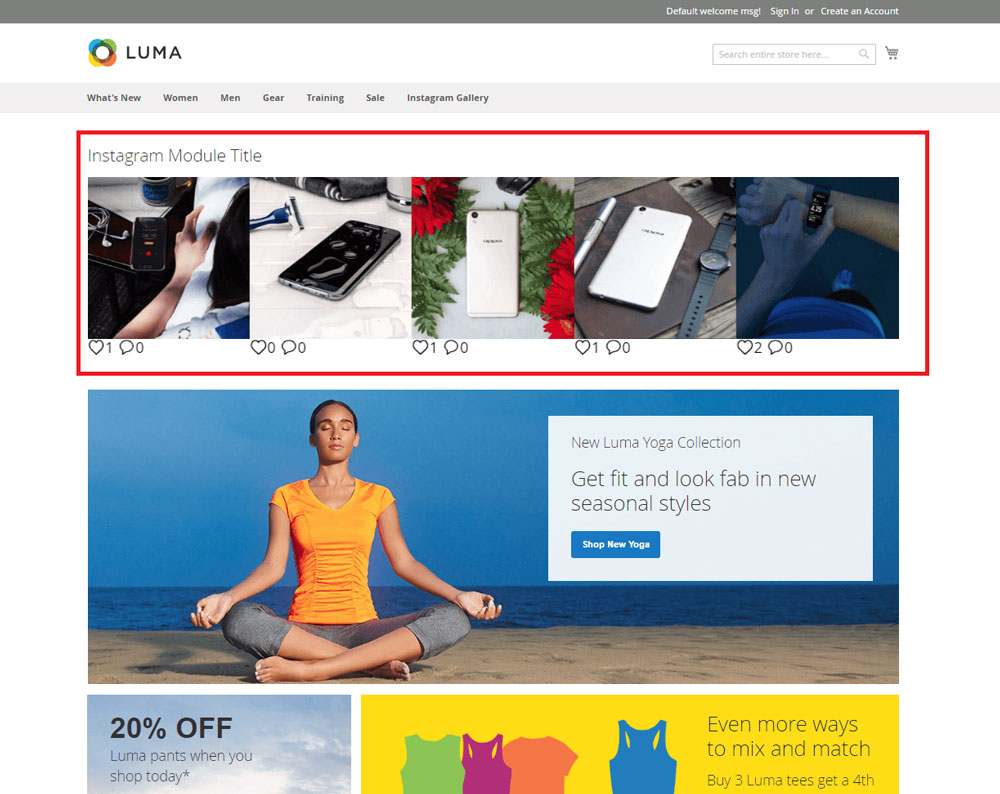
Bravo! You just created a slide of Instagram photos on your store’s front end. Pretty easy, right?
Hope this topic is helpful to you. If you need help setting up and configuring a widget on your Magento 2 store, or you’d like to gain more knowledge about our Magento development services, don’t hesitate to reach out! We are proud to offer the highest quality services at a competitive price – a pledge that can be seen in every service we provide.